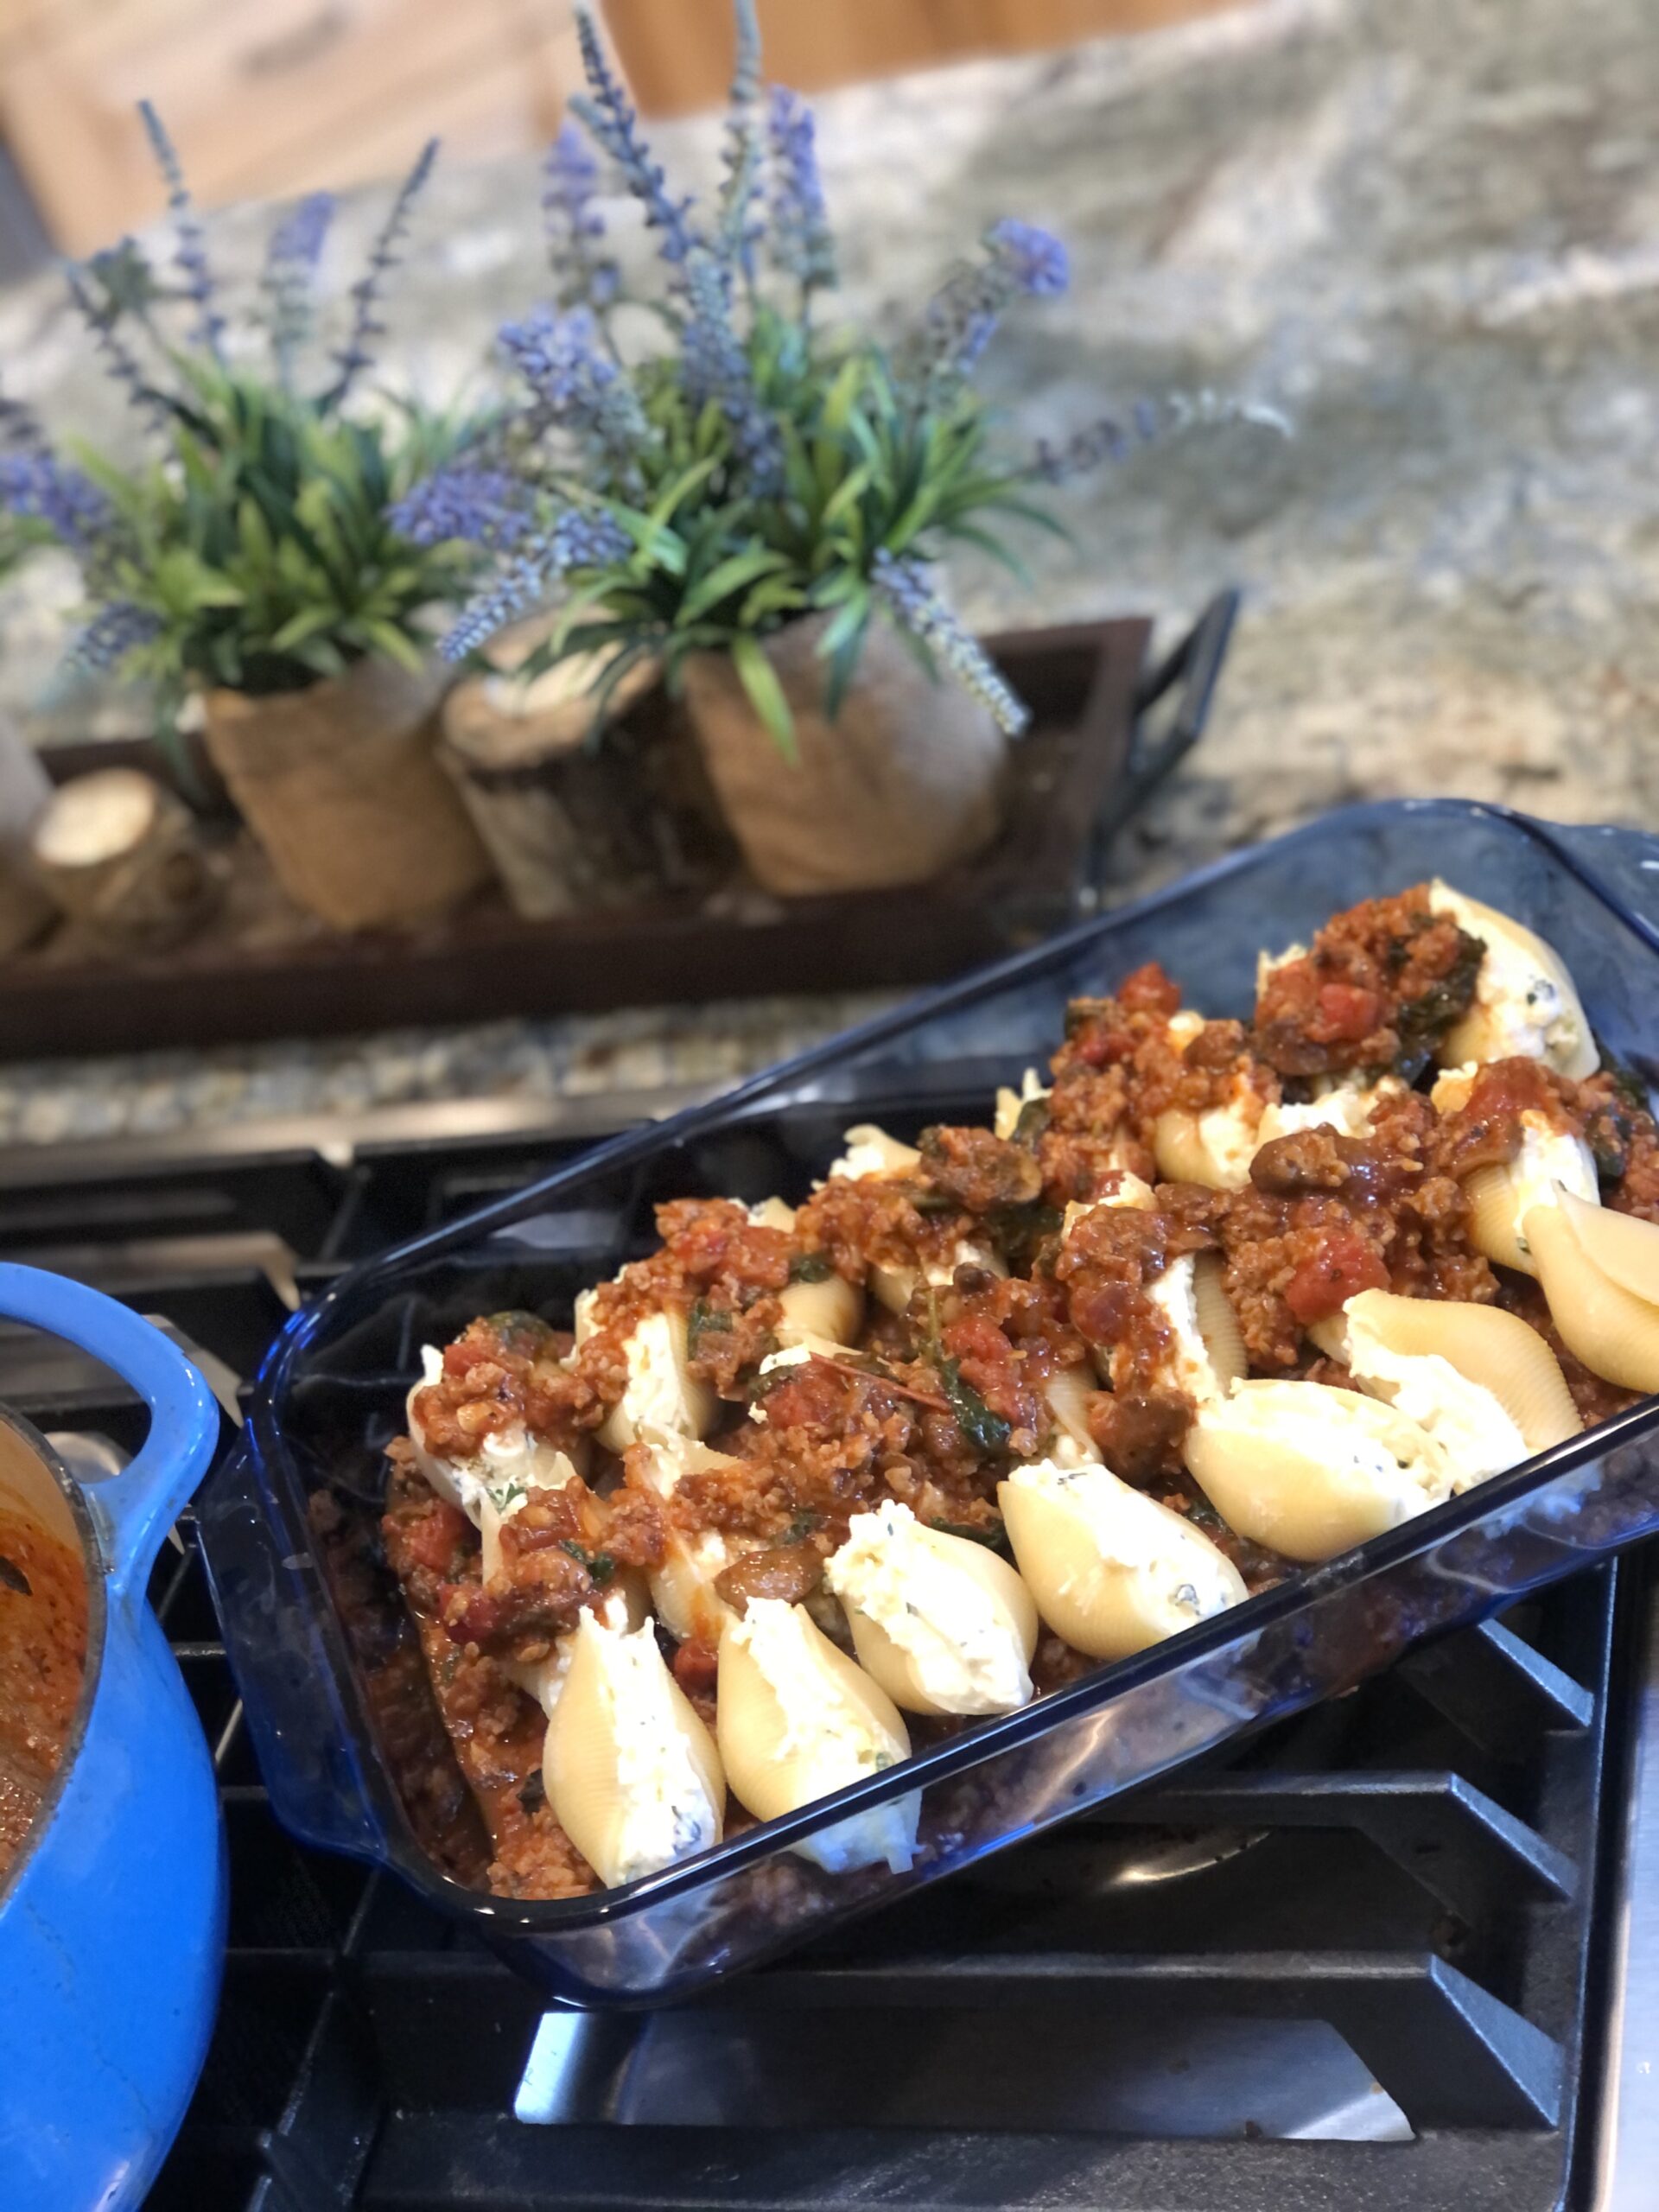
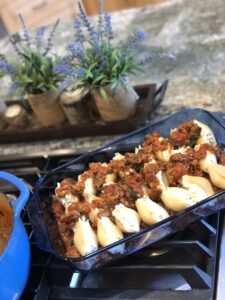
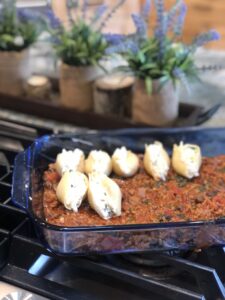
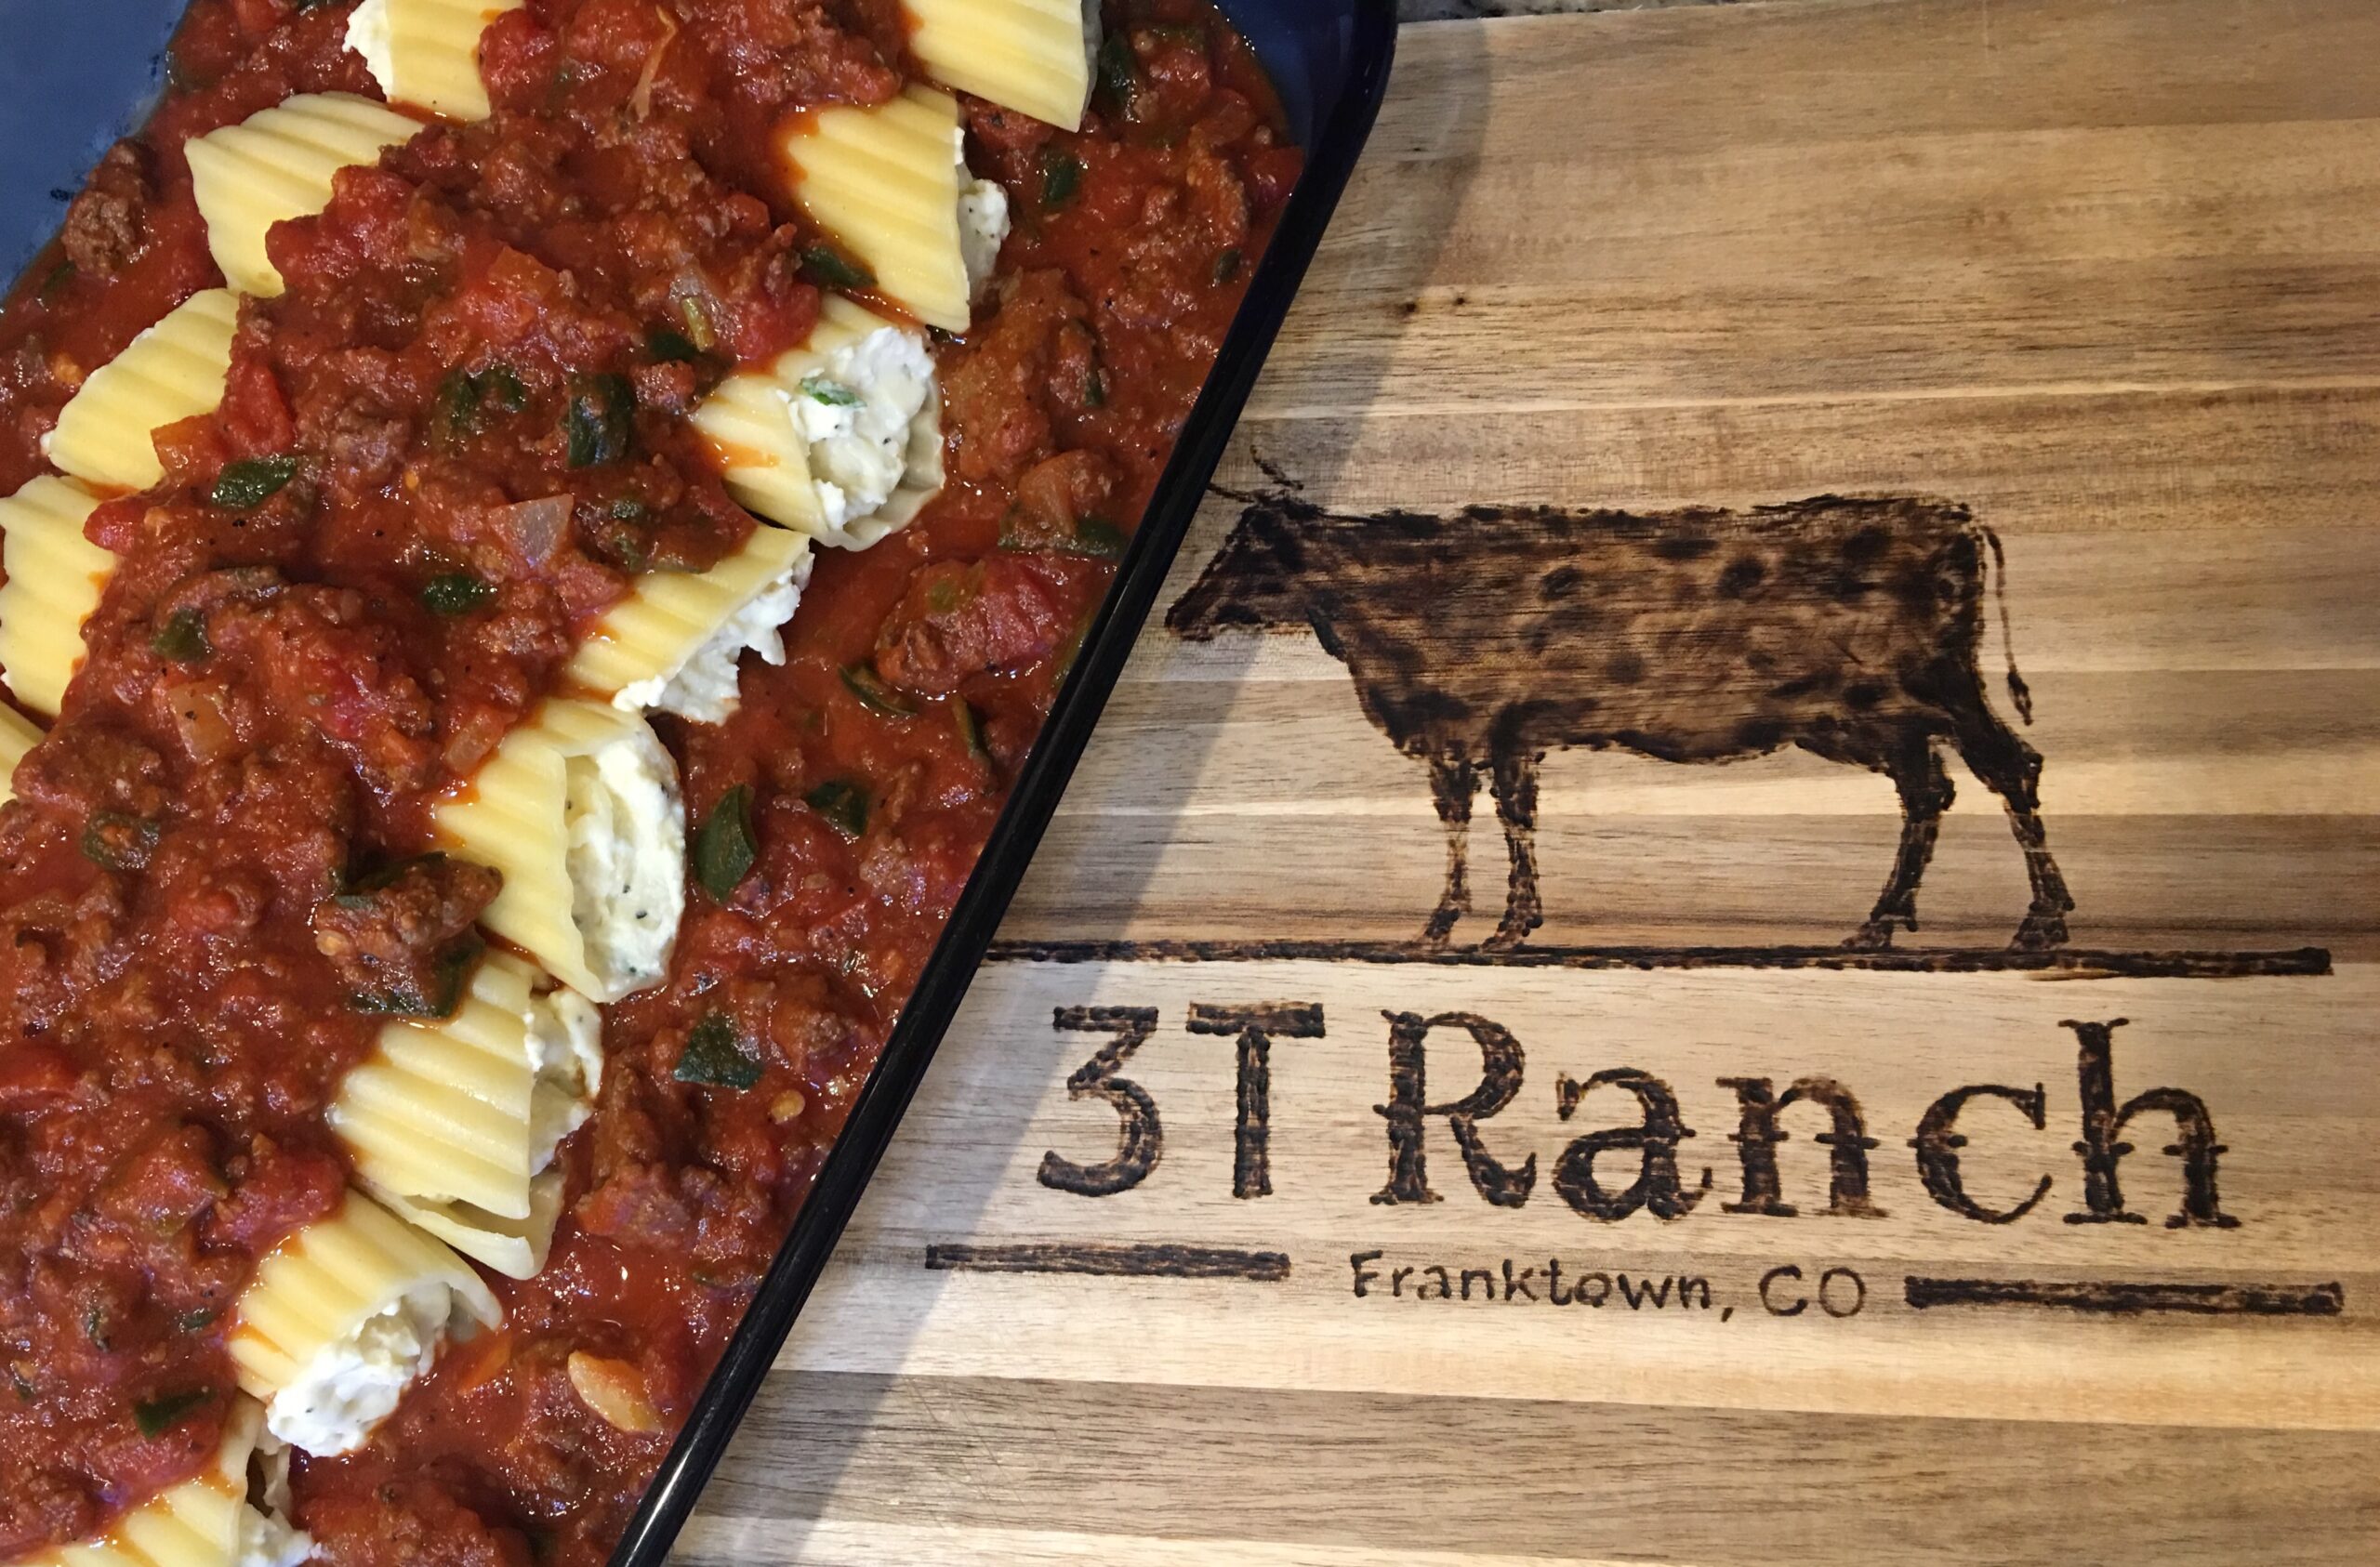
Stuffed Jumbo Pasta Shells with Grassfed Ground Beef
I like to meal plan and keep track of our favorite recipes. Stuffed Jumbo Pasta Shells are definitely on the monthly dinner rotation list. Easy, even after a long day of work, it doesn't take that long to put it together. Meal planning keeps me on track and I don't over spend at the grocery store. Every Sunday afternoon, I sit down at my desk and create a menu for the week. I meal plan for lunches and dinner since school is over and all of the kids are at home for the summer.
Stuffed Jumbo Pasta Shells are always a hit. Early in the week I make our favorite No Sugar Marina Sauce. This batch of sauce will be enough for this recipe and pizzas later in the week. It is worth it to prep it ahead of time. If you don't have time to make our sauce, store bought marina sauce is ok too. Just make sure to read the label and get the kind that doesn't have any extra sugar added.
Meal planning makes it easy to decide on dinner after a long day of working the cows, weeding the garden or the never ending fencing chores. So, here you go!
Ingredients:
For the Shells
- 1 box of Jumbo Pasta Shells (American Beauty 12oz)
- 15 oz Ricotta cheese
- 1 egg (room temperature)
- 1 cup shredded Mozzarella
- 1/2 shredded Parmesan
- 1/4 chopped up parsley
For the Sauce
- 1 lb 3T ground beef
- 2 jars of marinara sauce or 1/2 of our No Sugar Marina Sauce
- 1 tbls Italian seasoning
- 2 chopped up garlic cloves
- salt and pepper to taste
- 2 tbls fresh chopped up basil
Optional items to include in the sauce
- 2 cup of fresh spinach
- 1 cup of fresh mushrooms
Directions:
- Preheat oven to 350 degrees.
- Boil water and cook shells per package directions and let them cool.
- Mix Ricotta, Mozzarella and Parmesan cheeses along with egg and parsley.
- Cook ground beef, include garlic. (Wait to include the garlic until the beef is almost done cooking to prevent burning it). Mix with the sauce and let it simmer for 10 minutes. Stir occasionally. Stir in basil.
- Optional: sauté mushrooms and spinach for about 5 minutes and put into the sauce.
- Pour in 1/2 of the sauce in 9x13 cooking/oven dish.
- Stuff the shells with the cheese mixture, about one heaping tablespoon each.
- Lay the shells in the sauce and pour the remaining sauce over them.
- Cover with aluminum foil and bake for 30 minutes.
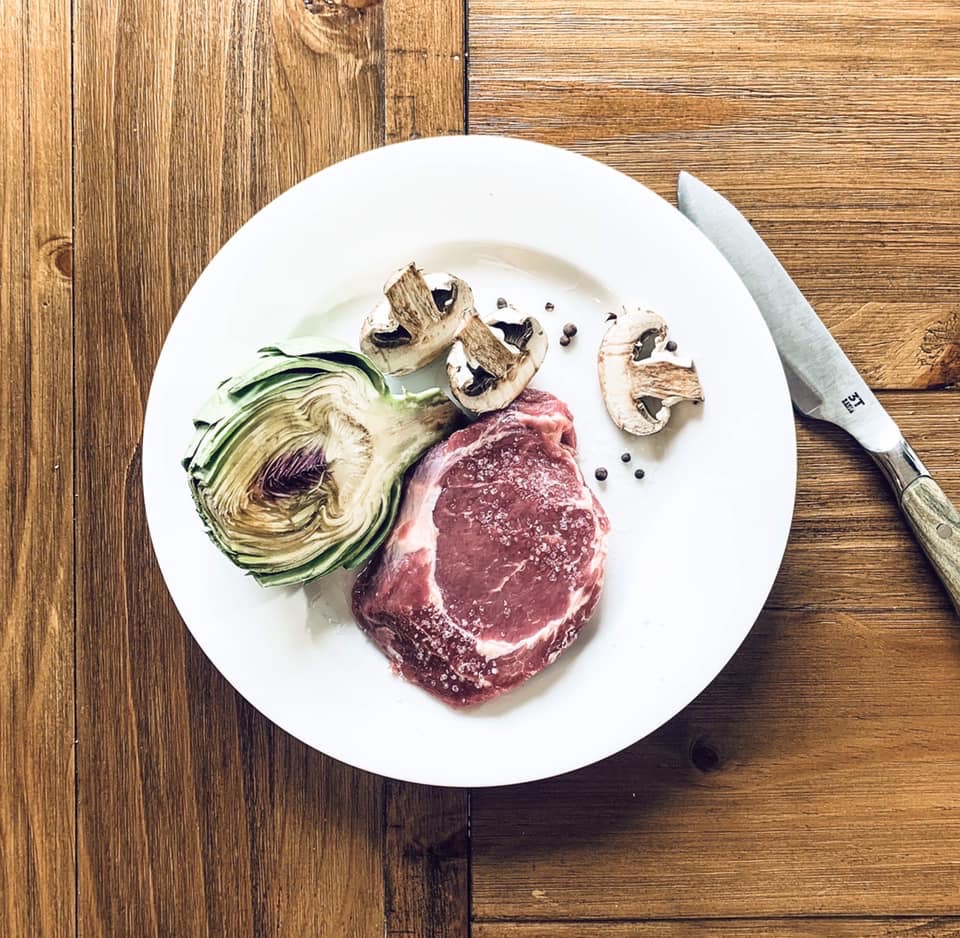
How to cook grassfed/grass finished steak
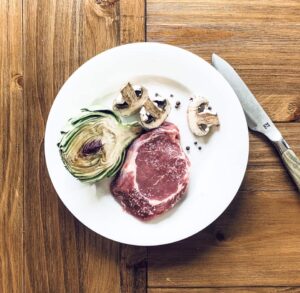
Cooking steak doesn't have to be intimidating!
Just follow these easy steps!
- Defrost steak overnight in the fridge or in cold water the day of
-
- defrosting steak in warm water or in microwave will partially cook the beef and it will be tough
- Let the steak rest on the counter for 20 - 30 minutes to bring it to room temperature
- Don't put defrosted steak from the fridge right in a hot pan, the steak needs to be room temperature
- Season with your favorite seasoning. Pepper and salt will do the trick as well. 3T steaks have delicious flavor already.
- Heat up your cast iron pan on medium heat - about three minutes, put in little bit of canola oil
- Grilling. Preheat your grill, no canola oil and now follow the same steps as for cast iron pan.
- Put in your steak and right away, turn the heat to low. All the way to low!
- 1 inch steak will typically cook for about 4 minutes on each side. Set the timer!
- Flip the steak after 4 minutes and cook for additional 4 minutes. Don't mess with the steak, just let it cook.
- Steak is cooked, but needs to rest. Cover the steak with aluminum foil and let it rest for 5 minutes.
- Ready to serve! Don't forget to cut the steak against the grain, which means against the direction that the muscle fibers run.

Grassfed Bone Broth Broccoli Soup & Sprouted Grilled Cheese Sandwich
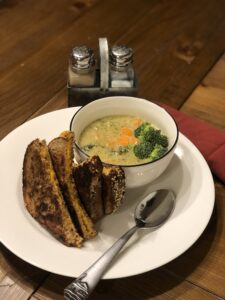
Delicious, healthy dinner that will please your whole family. January has been all about cooking healthy meals, but not sacrificing the taste. Grassfed bone broth brings wonderful richness to this dish to warm you up on a cold day. Soup and grilled cheese sandwich is a staple dinner at our ranch, especially after a chilly day full of chores.
Ingredients
- 1 head of broccoli cut up into bite size pieces
- 1/2 sweet onion - chopped
- 2 medium carrots - chopped
- 2 cloves of garlic - minced
- 2 tablespoons of grassfed butter
- 2 tablespoons of corn starch
- 32 oz 3T grassfed bone broth - https://3tranch.com/homemade-beef-broth/
- 1 cup grassfed milk and 1/2 cup shredded Cheddar
- salt and pepper to taste
- secret ingredient - 1 teaspoon of nutmeg
Directions
- Saute onion, carrots, broccoli and garlic in butter.
- Sprinkle corn starch over the vegetables and let it cook for a couple of minutes, constantly stirring.
- Slowly pour in the bone broth and milk while stirring.
- Season with salt, pepper and nutmeg.
- Simmer for 15 minutes.
- Take out 2 cups of cooked vegetables from the soup. Use immersion blender to pure the soup, put in your cooked vegetables. This will give the soup really nice texture, yet still have some whole veggies in it. Stir in Cheddar cheese.
I typically serve grilled cheese sandwiches with this soup. Recently, we have switched to sprouted bread to go with our January healthy meals. Sprouted grain bread is made from whole grains that have begun to sprout, or germinate.However, what you might think of as a grain is really a seed. With proper moisture and warmth, whole grain seeds begin to sprout into a plant.The sprouting process offers several nutrition benefits, compared to breads made from unsprouted grains or grain flours.In fact, sprouting changes the nutritional profile of the grains, making their nutrients more readily available and possibly easier to digest.
Our cows enjoy fodder sprouts every morning and the humans are enjoying sprouted bread! You can purchase sprouted bread at your local grocery store, in the freezer section.
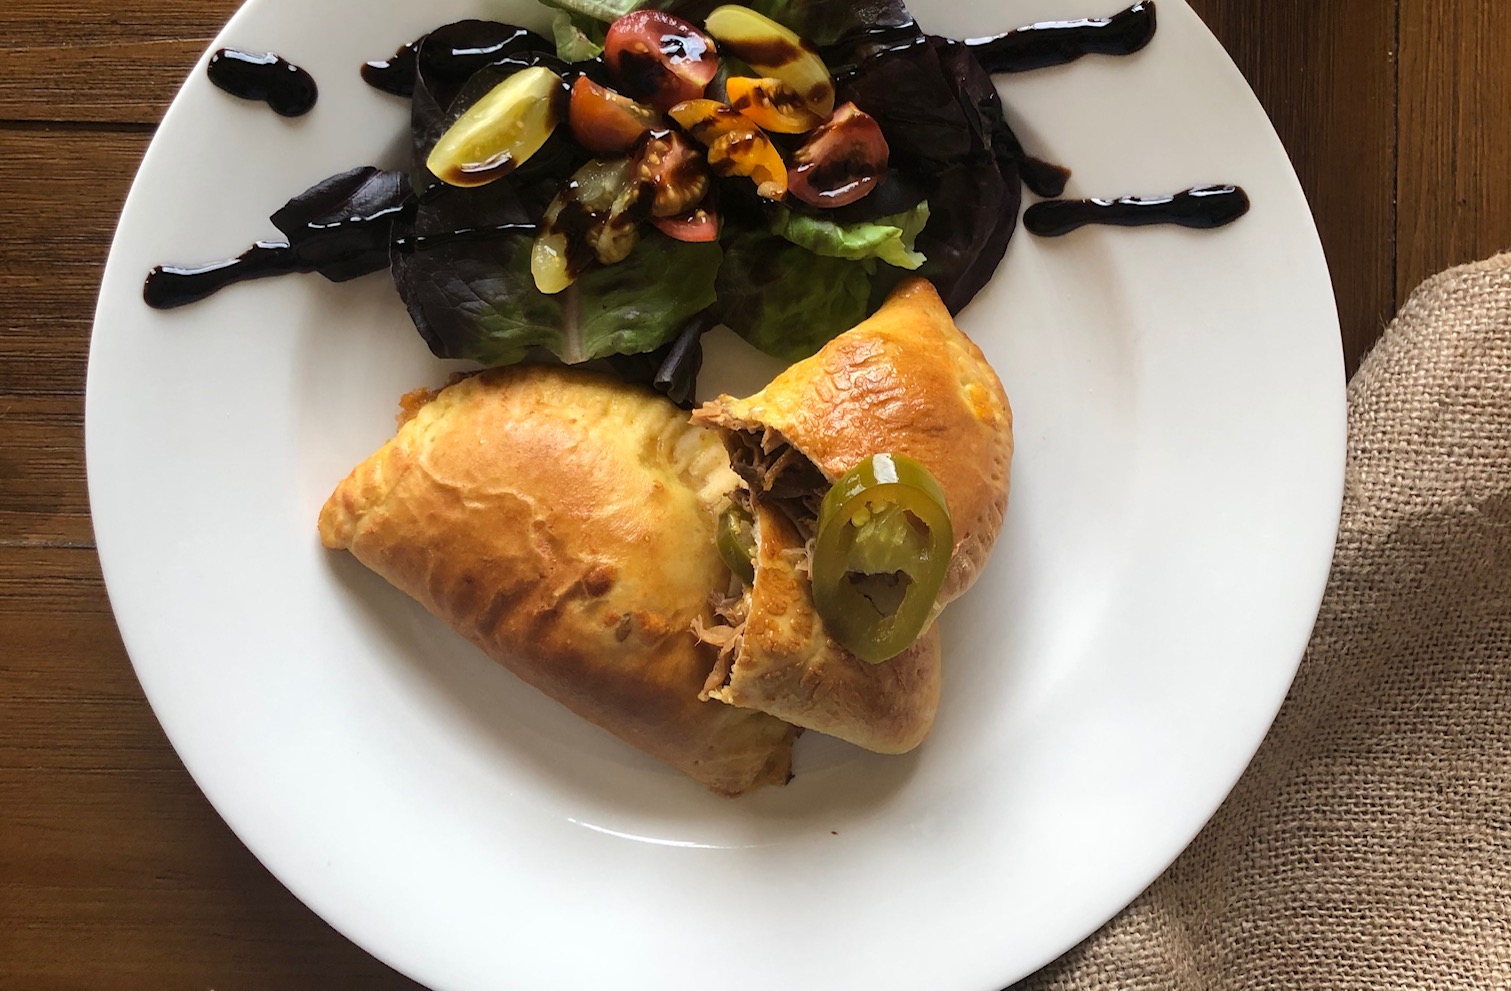
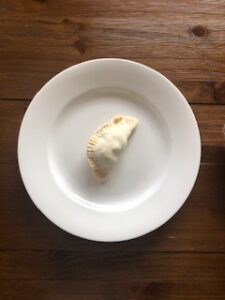
3T Beef Roast Leftovers - Roast Pockets
Well, we are on a week three on being at home and still adjusting to the always changing COVID-19 regulations and recommendations. We are typically home/ranch bodies end of March and April anyways, as it is a calving season for us and the Cowboss has to check on the mamas and the calves many times a day, but we do miss seeing our friends and family.
Calving season is a big deal on our ranch, we are very dedicated to make sure all of our mamas and calves have the best care. A good calving season will ensure that in two years, we will have enough animals to sell. Yep! This year's calving season effects our business in two years! Some days can be long and turn into evenings when a mama cow is in distress. I'm thankful that Scott is a season calf delivery cowboy and most of our births are pretty uneventful! We are expecting 60 calves this year and so far we have 15 little farts running around!
Since, our schools have been canceled, we have taken the opportunity to incorporate calving season into homeschooling. Even our little guy, Junior, who is 3, is now counting to 15 as he loves checking on the calves every morning and making sure they are all accounted for! Allie is very curious about the circle of life and how animals grow. (Future vet in the family?! It sure would be useful)! And our oldest, the Top Ranch Hand has been helping out with feeding the animals and fixing fence. Fixing fence is a never ending project, the good thing is that you really get to see every corner of the ranch pastures. He is learning that money is easily spent, but you have to do a good job at work to earn it.
I have been contributing to a smooth calving season in the kitchen. The cowboys are always hungry, especially after cold long day. Since, we are bound to be at home at least until the end of April, I have been trying and creating new recipes. Our grocery store has been out of stock for certain items, so I have been forced to improvise and really use up our supplies in the pantry, fridge and freezer. Nothing goes to waste.
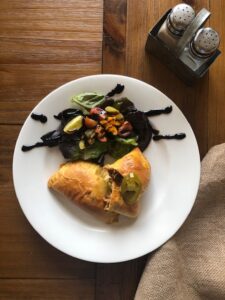
We are big fans of beef roasts and last week I have made BBQ Pulled Beef for dinner, which was a hit. The next day, I wanted to make sandwiches for lunch for my crew, but the store was out of cold cuts and so I came up with beef roast leftover pockets. BBQ pulled beef leftovers were the perfect substitution. It was warm, easy and a crowd pleaser. You can use any kind of beef roast leftovers, this recipe is versatile. Scott teased me that the plate had a salad with a balsamic glaze.. We really are a Ranch Dressing family! ;)
Ingredients:
- 10 frozen dinner rolls (Rhodes)
- 1 egg, 1 tablespoon water for egg wash
Filling:
- 2 cups leftover beef roast - shredded and liquid drained
- 1 cup shredded Cheddar
- 20 pickled jalapeño slices
Directions:
- Put frozen rolls onto a baking sheet. Cover with a kitchen towel and let it thaw and rise for 2 hours. Don't go more than 2 hours the dough will be harder to work with.
- Preheat the oven to 400 degrees.
- Roll out each dinner roll into a thin circle.
- Put 1 tablespoon of shredded beef in the center and top it with 1 scant tablespoon of cheddar and top with two jalapeño slices.
- Mix 1 egg and 1 tablespoon of water in a small bowl.
- Brush egg wash around the edges of the dough.
- Fold over the dough and press edges together with a fork. (It is important that you drain the liquid from your roast or the pocket will not seal correctly).
- Put pockets on silicon or parchment lined baking sheet and brush the tops with the egg wash.
- Bake for 10 to 12 minutes.
I like to serve these beef roast leftover pockets warm with a fresh salad and yes, Ranch Dressing!

3T Tamale Pie
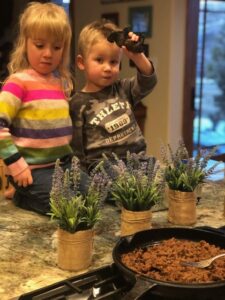
It was a fun night at our 3T Ranch making this tasty dinner. It feels good to be back into the swing of things and our regular schedule. Don't take me wrong, we all love the holiday season, but we are more disciplined when we stick to our regular schedule and we eat better.
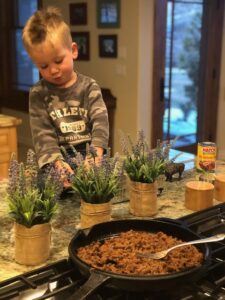
I sure enjoy when the kids want to help cooking dinner. Allie helped to measure the ingredients, Junior herded his cows around the kitchen counter and it makes my heart happy when Luke goes for seconds or thirds for dinner. The Cowboss added this meal to our "Family Dinner Rotation". I think they liked the Tamale Pie!
I hope you will try this recipe and have a fun family dinner evening. Sometimes, it doesn't have to be anything big, just happy people around the kitchen table to make a wonderful family memory.
Ingredients
- 1/2 cup all purpose flour
- 1 cup cornmeal
- 2 teaspoons baking powder
- 1 teaspoon salt
- 1 egg
- 1/2 cup sour cream
- 14.5 oz can of organic creamed corn
- 1/4 cup milk
- 1 lb 3T ground beef
- 10 oz can of whole green chile peppers - diced up
- 1 packet of Taco Seasoning or you can easily make your own
- 1 tablespoon chili powder
- 1/2 teaspoon salt
- 1/2 teaspoon pepper
- 1 teaspoon ground cumin
- 1/2 teaspoon dried oregano
- 1/2 teaspoon garlic powder
- 1/2 teaspoon onion powder
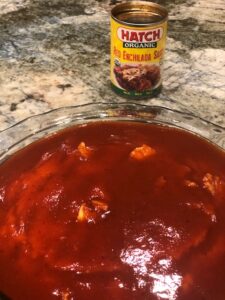
- 15 oz enchilada sauce (We like Hatch Organic Red Enchilada Sauce)
- 1 cup of enchilada sauce will be poured over the partially baked cornbread
- Save the remaining enchilada sauce to serve with your baked dish
- 1 cup shredded Pepper Jack cheese
- 1/2 cup chopped cilantro
Serve it with - guacamole, sour cream, extra enchilada sauce, salsa, Spanish rice.
Directions
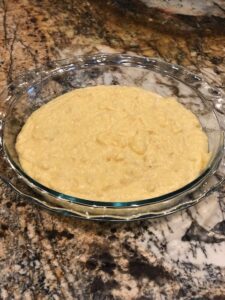
- Preheat oven to 400 degrees. Grease a baking dish.
- Mix together the dry ingredients - cornmeal, flour, baking powder, salt.
- Add the following to your dry mixture - egg, sour cream, creamed corn and milk.
- Pour the cornbread mixture into the baking dish.
- Bake for 25 minutes.
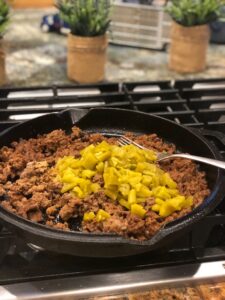
- In the meantime, cook your 3T ground beef, put in your seasoning. Your own taco mix or taco packet from the store is just fine too.
- Cut up the chile peppers and put in with the ground beef.
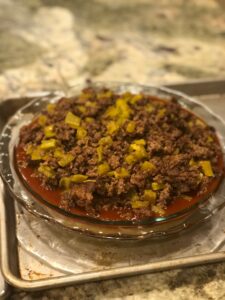
- Take the cornbread out of the oven. The cornbread won't be fully cooked, that is OK it will go back in the oven after the dish is assembled.
- Poke holes in the cornbread with a fork and pour 1 cup of enchilada sauce over it.
- Now comes the meat mixture and peppers and cheese.
- Put your dish onto a cookie sheet to avoid any messes in the oven.
- Bake for additional 15 minutes or until the cheese is bubbly.
- Serve with Spanish rice, guacamole, sour cream, extra enchilada sauce and salsa. My crew liked pouring the extra enchilada sauce over their slice of tamale pie.
Dobrou Chut!

3T Cheeseburgers


We love cheeseburgers, weekly dinner for our family. In the summertime, we grill and enjoy a nice evening on our patio. The Cowboss is a pro! The rest of the year, I cook our cheeseburgers inside in my cast iron skillet. Low and slow is the key, on the grill as well as when cooking with the cast iron skillet.
Why are our cheeseburgers the best? Grassfed beef has many health benefits, but also a delicious flavor that gets enhanced by Dijon Mustard. That is our secret ingredient when making cheeseburgers!
We hope you will give this recipe a try!
Ingredients:
- 1 lb 3T ground beef
- 1 teaspoon salt
- 1 teaspoon pepper
- 1 tablespoon Dijon Mustard
- 4 slices of Cheddar or PepperJack Cheese
Directions:
- Mix ground beef, salt, pepper and Dijon Mustard.
- Form 4 patties.
- TIP - make a round indent in the middle of the uncooked patty, so your burgers stay flat.
- Grill or cook in the cast iron pan on low and slow.
- Select your choice of cheese. The kids will always vote for Cheddar, but the cowboys love PepperJack.
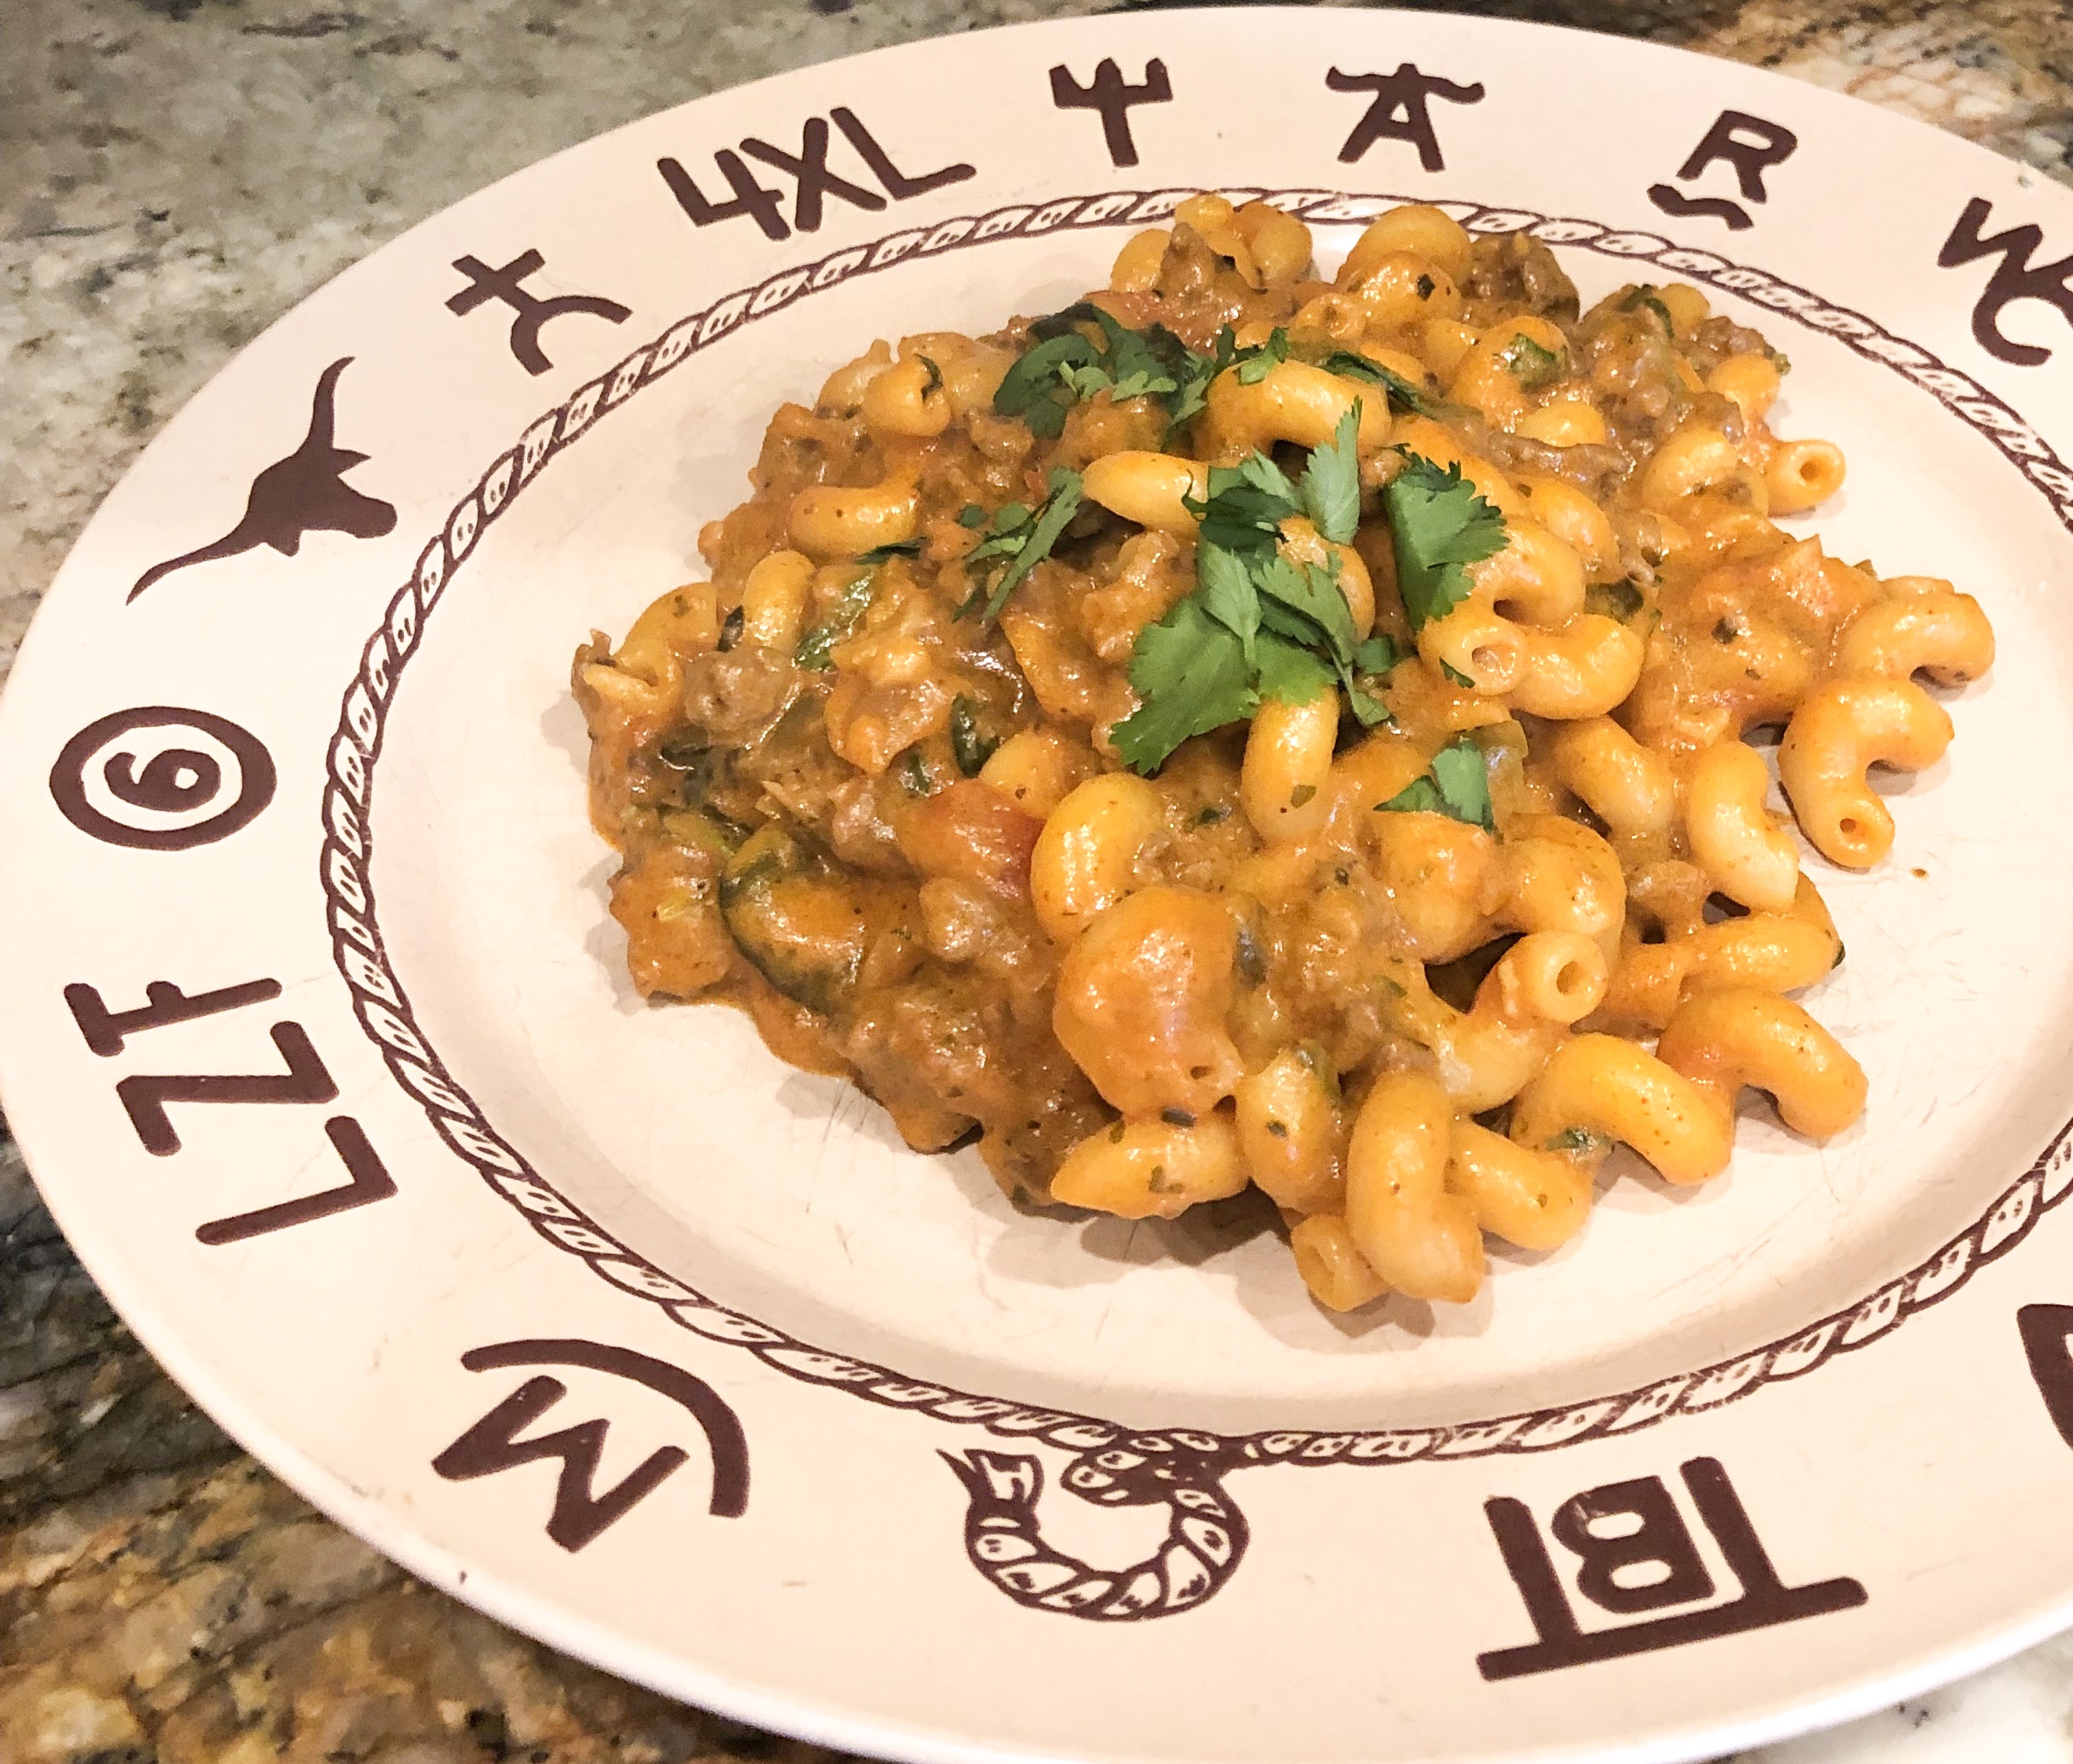
Beef Enchilada Pasta
April gives us just enough taste of the warm spring weather and then we get hit with another snow storm! As I'm typing up this recipe, the snow is coming down really hard and we are expecting another blizzard. Many businesses are closing down for the day and I wouldn't be surprised that schools will call a snow day for tomorrow. We sure do need the moisture after a very dry summer last year. I will be happy about the green grass later this year, but it is cold and snowy right now.
Our new favorite recipe on days like today is Beef Enchilada Pasta. You can make it mild or as hot as you like it. Since, we have little guys, I went with the mild version today.
You can use ground beef for this recipe, but I think it really adds POW flavor, if you cook up the ground beef chorizo.
Ingredients:
- 1 lbs of 3T ground beef or beef chorizo
- 1 box of your favorite pasta
- 1 chopped up medium size onion
- 4 finely chopped up garlic cloves
- 1 chopped up bell pepper
- 1 cup of your favorite salsa
- 15 oz can of Hatch Organic Red Enchilada Sauce
- 2 cups of shredded cheddar cheese
- 1 bunch of chopped up cilantro
- salt and pepper to taste
Instructions:
- Cook pasta per box directions.
- Saute onion, garlic and pepper, stir in ground beef or chorizo and cook until done.
- I typically use my pasta pot as it is big enough to stir in the rest of the ingredients.
- Stir in pasta, garlic, onion, pepper, ground beef, salsa, enchilada sauce and cheese. Heat through, so the cheese is nice and melted.
- Taste it! Does it need more salt or pepper?
- Sprinkle with cilantro.
- Ready to serve!

3T's Favorite Ground Beef Recipes

Sometimes life gets busy and having on hand some easy and tasty recipes can surely save the day. I’m thinking we need some weeknight dinner ideas to add to our meal plans, what do you think? For this post, I have decided to go with ground beef recipes. Ground beef is so versatile from burgers and pastas to delish casseroles. I know that if I'm in a bind, my ground beef package can be defrosted in 20 minutes (defrost in cold water). It is always a good idea to stock up on 3T ground beef to help you on busy nights. The recipes below are 3T's favorite recipes, the cowboys love it, the kids love it, hungry teenagers love it. I have even served the Sloppy Joes during a ladies' dinner party and it was a hit. You can buy 3T ground beef on our website or at Wheat Ridge Poultry and Meats. We hope you will give these recipes a try! Let us know what you think. We love seeing photos from our customers cooking with 3T beef.
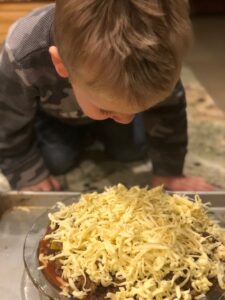
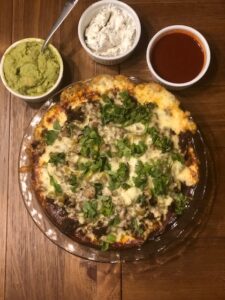
No Sugar Marinara Sauce
I have created this recipe earlier in the summer and it has been a major game changer for our pasta and pizza dishes. My Cowboss challenged me to eliminate sugar from our savory dishes. You would be surprised how sneaky sugar really is and how many recipes or marinates call for sugar that is really not necessary. When I first started to look into homemade marinara recipes, many of them included sugar to offset the acidity of the tomatoes, so I needed to find a substitute. After a few failed recipes, I have hit the jackpot with sautéed shredded carrots that gave the sauce the much needed sweetness. The best part of this marinara recipe.. it is done in 30 minutes. You don't need to cook it for hours. The carrots give it the nice sweetness and the beef broth, which is an important ingredient, gives it the depth of flavor you need in a good pasta sauce.
I have been making delicious "red sauce" dishes like spaghetti squash with southwestern beef sausage, cheese cannelloni with marinara sauce and ground beef and this sauce is hands down awesome on homemade pizzas. This recipe makes enough red sauce for two family dishes. It last for a week in the fridge.
Over the summer, we have also teamed up with a great family owned business Wheat Ridge Poultry & Meats and they carry our 3T Ranch beef at their store. Rob and Jess are wonderful business partners and they have extended the line of 3T Ranch products that are now available to our customers. WRPM carries various cuts of 3T beef, but also make many varieties of beef sausages, jerky and beef broth.
I hope you will try the recipe and love it as much as we do.
Ingredients:
- 28 oz fire roasted crushed tomatoes
- 6 0z tomato paste
- 2 large shredded carrots
- 1 medium onion - small dice
- 1/2 garlic head - crushed through garlic press
- 3 tablespoons olive oil
- 1 tablespoon Italian seasoning
- 1 teaspoon salt
- 1 teaspoon black pepper
- 3-4 cups of beef broth
- 6 basil leaves finely chopped or 1 tablespoon of homemade pesto
Directions:
- In a large pot pour olive oil, saute onion and carrots until onions are translucent, add garlic and cook for a couple of minutes.
- Pour in crushed tomatoes and tomato paste. Make sure to stir to break up and incorporate the tomato paste.
- At this point I like to include all of my seasonings.
- Pour in 3 cups of beef broth. Cook it down for about 15 minutes.
- You can certainly leave the sauce chunky, but my family likes it smooth, so I pure the sauce with my immersion handheld blender.
- Add your basil or homemade pesto. (Tip - I store my homemade pesto in ice cube trays. It is the perfect portion and it stores well in the freezer).
- I typically end up pouring another cup of broth into my sauce unless I'm using it right away as a pizza sauce. Cook the sauce for another 5 - 10 minutes.
Dobrou Chut!
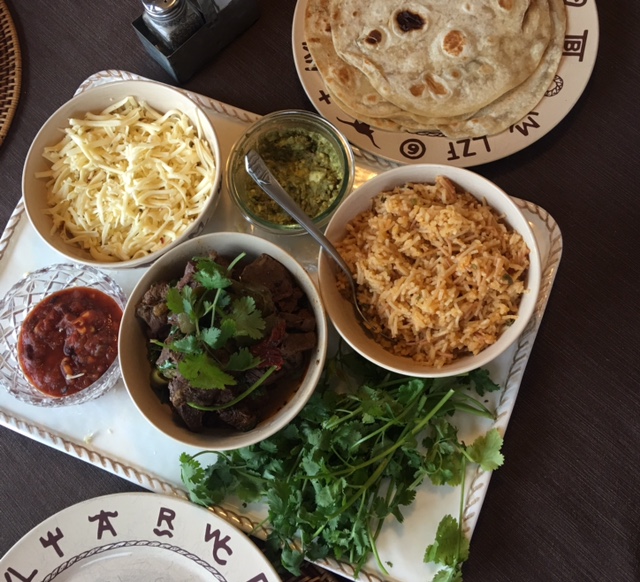
Beef Tacos for Busy Summer Nights


Are your summer days packed with activities and dinner becomes a big headache? The 3T crew is busy with ranch construction projects, fixing fences, transporting cattle to summer pastures and the kids have their own summer activities. Plus, we have decided to get not one, but two puppies.. I know, who does that? Their parents are great cattle working dogs and we could always use help to work our cows. So, I don't know about you, but by dinnertime, I'm pretty tired.
Here is an easy summer recipe, so you can enjoy dinner on your deck or patio. Nobody wants to spend a couple of hours making dinner. Even better.. The InstaPot or CrockPot will do the cooking for you in this recipe, so you can enjoy a Margarita while dinner is cooking on its own!
Ingredients:
- 3 lbs 3T Ranch Beef Roast (you can also use flank or skirt steak)
- 1 tablespoon dry oregano
- 1 tablespoon salt
- 1/2 tablespoon ground pepper
- 1 diced medium sweet onion
- 1 diced bell pepper
- 1/4 cup canola oil
- 4 chopped garlic cloves
- 1 can (7.76 oz) LaCostena Chipotle Sauce or Chile in Adobo Sauce (if using Chile in Adobo Sauce - use two peppers and scrape out the seeds, then use all of the sauce from the can and discard the rest of the peppers It would be too spicy to use all of the peppers).
- 1 cup beef broth (2 cups of beef broth for CrockPot version)
Directions for InstaPot: Preferred 3T method
- Cut up your roast into bigger chunks. (I think the beef cooks better vs just putting in the whole roast).
- Set your InstaPot on "sear" and pour in 1/4 cup of canola oil.
- Dry off your beef chunks with a paper towel and season with salt and pepper.
- Now, that the pot is hot, sear the beef chunks on all sides. Take out the beef.
- Time to sauté the onion and bell peppers. Give it a couple of minutes to sauté the veggies before adding the garlic. You don't want the garlic to burn. Cook until all veggies are tender.
- TIP: if your onion is getting a little burned before being tender add a little bit of water to the pot.
- Add oregano, one can of Chipotle Sauce and one cup of beef broth and stir all together.
- Beef goes back in the pot, close the lid and set your InstaPot on "Beef Stew". Depending on your InstaPot setting, your beef will be done in about 60 minutes. If you are using steaks, you can cut down the cooking to 35 minutes.
Directions for CrockPot: This recipe
- You can certainly use CrockPot for this recipe as well.
- Dry off your beef chunks with a paper towel and season with salt and pepper.
- Heat your skillet and add 1/4 cup of oil.
- Sear the beef in a skillet on all sides. Take out.
- Time to sauté the onion and bell peppers. Give it a couple of minutes to sauté the veggies before adding the garlic. You don't want the garlic to burn. Cook until all veggies are tender.
- TIP: if your onion is getting a little burned before being tender add a little bit of water to the pot.
- Put in the CrockPot - oregano, one can of Chipotle Sauce and two cups of beef broth and stir all together.
- Beef goes in the CrockPot.
- Set you CrockPot for high for 4 hours. (I don't like to cook my beef on low in the CrockPot. I think the beef gets too dry on the low setting).
- Make sure to check your liquid levels during cooking.
Beef is done, time to serve it to your crowd. You can certainly shred the beef, but we do like the beef in chunks. You can cut the beef into bitesize chunks. The beef is juicy and tender, you can discard the sauce the beef was cooking in. (Or you can certainly skim off the fat and reduce the liquid in a sauce pan. It will have a kick. The beef on its own is not spicy). I typically serve the beef with rice, guacamole, salsa, pepper jack cheese and Costco uncooked flour tortillas. I know it adds another step to your cooking, but it is so worth it! And if you really want to step it up.. Here is a recipe for Homemade Corn Tortillas!
Homemade Corn Tortillas:
Ingredients:
- 1 1/2 cups masa harina, more for dusting
- 1/2 teaspoon salt
- 2 tablespoons fat such as melted lard, butter or canola oil
- 1 cup hot water, plus more as needed
Directions:
- Place masa and salt in a bowl and throughly combine with the fat, mixing with fingers or a whisk. (KitchenAid works great for this). Slowly stream in the water while mixing until the dough comes together into a ball.
- Turn the dough onto a lightly floured surface and knead until smooth, about 1 minute.
- Divide the dough into 12 portions and form each into a smooth ball.
- Place masa balls on a baking sheet, cover with plastic, rest for 30 minutes.
- After the dough has rested, preheat a cast iron skillet over medium-high for 5 minutes, then reduce heat to medium.
- If the dough has dried slightly during resting, wet hands and roll each ball again to moisten. Place the dough between two sheets of plastic wrap and place directly in the center of the tortilla press. Press down firmly, then durn the tortilla 90 degrees and press again.
- Transfer it into the hot skillet. Cook the tortilla until brown spots appear on the bottom, about 1 minute. Flip with a thin metal spatula, and do the same on the other side.
TIP: Sur La Table has many great gadgets how to keep you tortillas warm while you are cooking the rest. The homemade tortillas might sound intimidating, but they are really easy. I have taken a class at Sur La Table with my friend and the tortillas were piece a cake to make and the flavor was amazing!!
Dobrou Chut!