
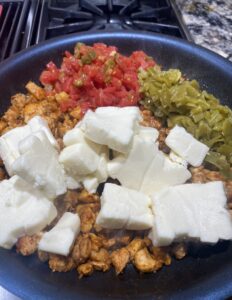
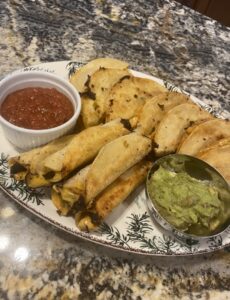
Creamy Chicken Western Tacos
Our family can eat tacos breakfast, lunch and dinner and these creamy chicken tacos are our new staple. I will be making this recipe next time we have company. Fried taco bar, anybody?

Ingredients:
- 2 large chicken breasts - small cubes
- 10 oz mild diced tomatoes with green chilies
- 1 poblano pepper - diced
- 2 teaspoons smoked paprika
- 2 teaspoons ground cumin
- 2 teaspoons minced onion
- 2 teaspoons Lawry's seasoned salt
- 16 oz Velveeta Queso Blanco
- 1/2 cup shredded cheddar
- 1 bunch chopped cilantro
- corn tortillas
- avocado oil for frying

Directions:
- Cut chicken into small cubes. Cut up poblano into small pieces.
- Heat up non-stick frying pan and pour in 2 tablespoons of avocado oil.
- Season with smoked paprika, ground cumin, minced onion and Lawry's seasoned salt.
- Stir in poblano and cook until chicken is almost cooked through.
- Cut up queso blanco into smaller cubes, drain diced tomatoes with green chilies and pour into the pan along with shredded cheddar and chopped up cilantro. Let it "marry" and thicken.
- Heat up a large cast iron pan pour in 1/4 cup of avocado oil. Put chicken mixture into corn tortillas fold over and fry. (Don't over stuff your tacos, less filling is better). About 30 seconds on each side until crunchy.

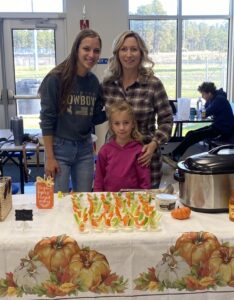
2023 Award Winning Buffalo Chicken Chili
So exciting! 3T Ranch has won the Upton FFA Chili Cook-Off Competition two years in a row! I was so glad to have helpers this year and the ladies ruled the competition. It is hunting season and the guys were scouting the ranch for deer and pronghorn while the ladies were busy in the kitchen getting ready for the chili cook-off. Our oldest one Luke came home for the weekend with his girlfriend Laura, who was in charge of cutting up all of the vegetables while Allie and I made sure the buffalo chicken chili had all of the other ingredients.
I knew I needed to make something different to stand out in the competition. Even though, we are a small Wyoming town, the competitors sure make some amazing chili.
Lots of flavor come from the rotisserie chicken, broth along with the spice from the buffalo sauce that gets balanced out with the corn and cream cheese. Some people may not like blue cheese crumbles, but it is a crucial ingredient and it gives a wonderful zing to the chili. Nobody will guess it is there and for the blue cheese lovers, you can serve extra blue cheese to put on the top of the soup. The celery leaves will give the soup nice herb freshness.

As my mom would say, presentation is 1/2 of the competition. We had to stand out not only with our amazing chili, but also with the table decor and some extra snacks to go alongside with the chili. We have served carrots and celery sticks in a cup with ranch dressing and extra blue cheese crumbles. People will notice this extra step.
It was a fun afternoon with Laura and Allie and the guys showed up just in time to vote for us and taste this award winning chili.
I wonder what we will make next year! Not only it is fun to win, but what a great way to support our FFA organization and our students.
Ingredients:
- 1 rotisserie chicken - cut up into bite size cubes
- 4 large carrots - small cubes
- 5 celery stalks - small cubes along with the leaves
- 1 sweet onion - small cubes
- 1 can organic corn - don't drain the can
- 8 oz cream cheese
- 1/2 bottle of 12 oz Frank's RedHot Buffalo Wings Sauce (you can always add more)
- 1 can 10 oz Rotel fire roasted diced tomatoes & green chillies
- 2 cans 15.5 oz each Cannellini beans - don't drain the can
- 5 oz blue cheese crumbles (crucial ingredient, nobody will know it is in the chili, but it will add a nice zing to the soup).
- 1 dry Ranch salad dressing mix (dry packet seasoning)
- 2 32 oz each chicken broth
- salt and pepper to taste
Directions:
- Saute carrots, onion and celery until translucent.
- Cut up rotisserie chicken.
- Pour chicken stock into crockpot along with chicken, carrots, onion and celery.
- Mix in cream cheese, Buffalo sauce, Rotel fire roasted diced tomatoes and Ranch dressing packet.
- Cook for couple of hours on high.
- Pour in corn and beans along with all of the cans' liquid.
- Cook for additional 30 minutes. Mix in blue cheese crumbles and celery leaves right before serving.
- You can always add more liquid (water or stock) if desired or thicken with 1/4 cup of cornstarch and 1/4 liquid from the chili. You will have to cook the chili for additional 15 minutes, if you are using cornstarch as your thickening agent.

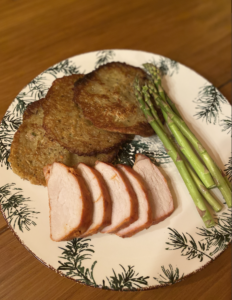
Grassfed Round Pepper Steak
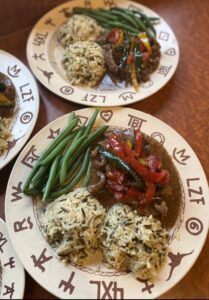
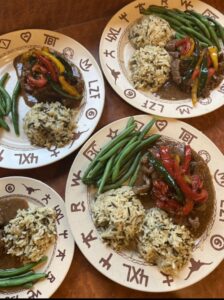
We have had a busy Wyoming spring so far! Setting up our new ranch, calving and our new business venture a hunting operation! 3T Ranch hunters are treated to some amazing meals, including our grassfed/grass finished beef, during their stay while hunting on our ranch. One of the recipes is Grassfed Round Pepper Steak. My family loves being the new menu testers. If it is approved by them, it will be a hit!
This meal will be great for cold fall/winter evenings when the hunters come back to their cabin after hopefully a successful big game hunt. But, you never know.. it is end of May and it is snowing in Wyoming?! So, all year long dish!
Ingredients:
- 2 grassfed round steaks
- 1 red and 1 yellow peppers
- 1 poblano pepper
- 1/2 onion
- 5 garlic cloves, finely chopped
- 1 packet of onion soup mix
- 1/2 cup of grassfed beef stock
- Optional: crispy onions as garnish (store-bought)
Directions:
- Cut the steak into thinly slices, it helps when it is still partially frozen.
- Cut peppers and onion into thinly strips.
- Put steak, onion soup mix, beef stock and onion into an InstantPot. Set on manual/high for 20 minutes, natural release after 10 minutes.
- Saute peppers and garlic in cast iron pan for a nice char. Since the beef is nicely tender, the crunchy peppers will add a nice contrast.
- I have served the meal with wild rice and steamed green beans.

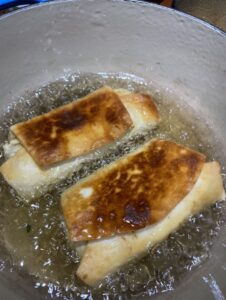
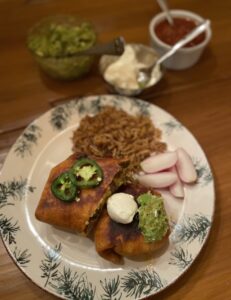
Grassfed Ground Beef Chimichanga


Time sure goes fast. We have been at our new Wyoming ranch for almost three months and I'm happy to report that we are settling quite nicely. My kitchen is all set up and I can start producing some new tasty recipes! We have had a couple of weeks of really cold weather, colds and runny noses. I guess we are getting used to the new "Wyoming germ". ;) We have spent a lot of time inside the house, so we have baked many cookies, brownies and cooked tasty dinners. Here is one of them - Ground Beef Chimichanga.
Ingredients:
- 2 lbs grassfed/grass finished ground beef
- 1 packet Mild Chorizo Spice Blend (similar packet to taco seasoning)
- 1 can (4 oz) of diced green chile peppers
- 1 can (15 oz) drained black beans
- 1 bunch cilantro - chopped up
- 1 (10 0z) Queso Fresco Milk Cheese - shredded
- 9 burrito sized tortillas
- 2 cups canola oil for frying
- 3/4 cup water

Directions:
- Cook ground been in a large pot, so all of the ingredients can fit.
- Mix in one packet of the chorizo seasoning and 3/4 cup of water, let it cook for about 5 minutes on low heat.
- Stir in beans, green chile peppers and cilantro, cook for a couple of minutes.
- Grade the cheese, turn off the heat and incorporate the cheese with the meat mixture.
- In the meantime, heat up your oil in a large dutch oven. You want 1/2 of the burrito to be submerged in the hot oil.
- Set out your burrito tortillas and put meat mixture in the middle of it. You don't want to over stuff it. Roll as you would with a burrito.
- Put in two burritos at a time into the hot oil and cook for about 1 minute on one side and 30 seconds on the other or until gold brown. Start with the seam side down, so your burrito will close up.
- I have served the chimichanga with Spanish rice, guacamole and sour cream.
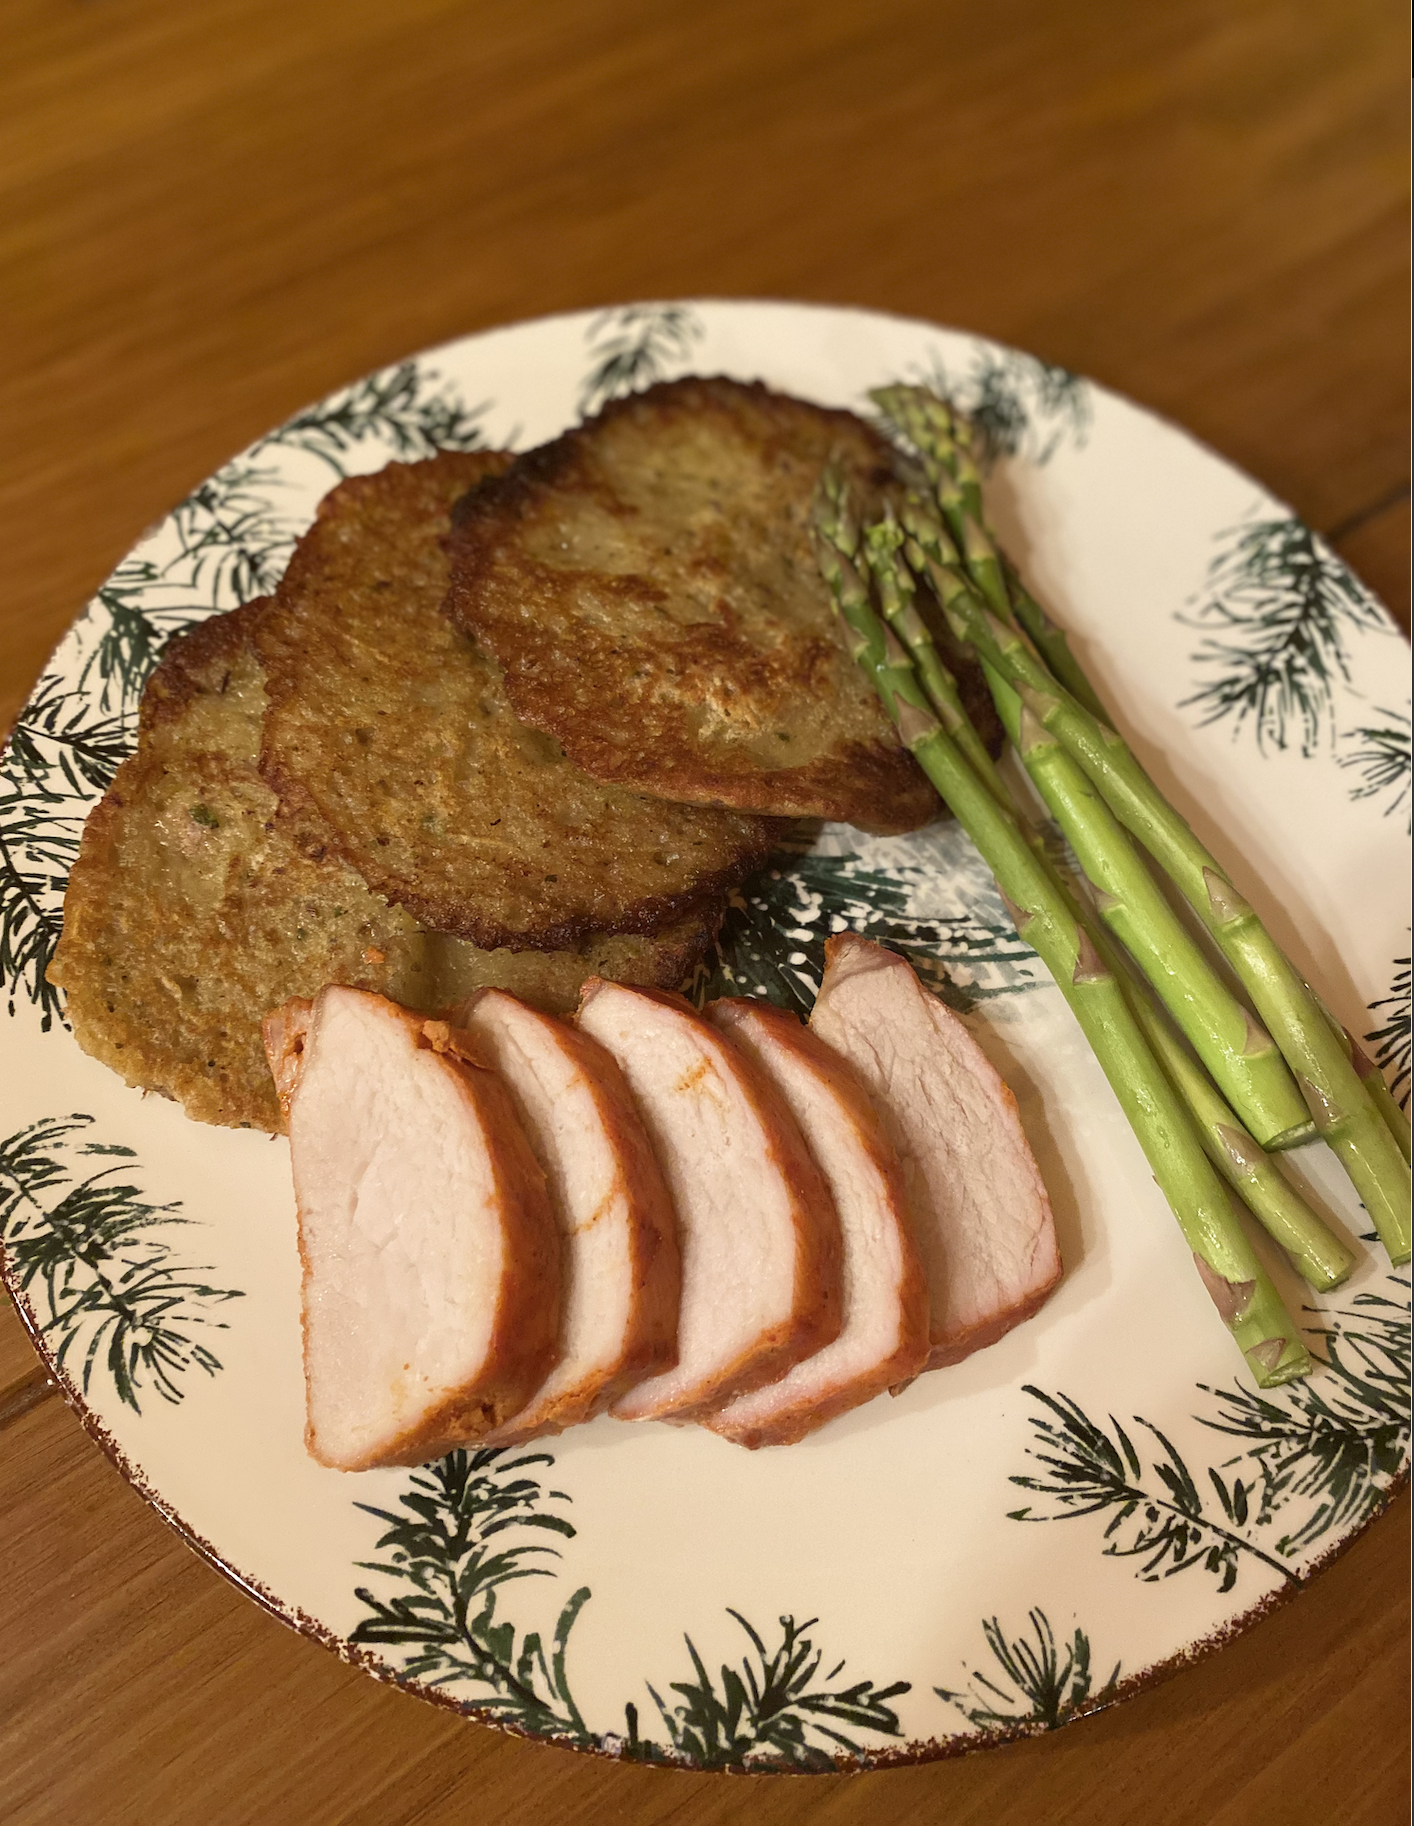
Savory Potato Pancakes - Latkes
This side dish will be your new favorite! Garlicky potatoes that are fried.. yep, really tasty!
Ingredients:
- 2 lbs potatoes
- 2/3 cup flour
- 1 egg
- 1/2 cup hot milk
- 6 cloves of garlic (freshly pressed)
- 1 tbsp majoram (dried)
- 1 tsp caraway seeds (crushed)
- 2 tsps Lowry's salt seasoning - regular salt would be ok too
- Avocado oil and grassfed butter for frying
Directions:
- Peel potatoes and finely grate them. Let them sit for a couple of minutes and drain the excess water.
- Heat the milk until it gets hot and pour over the grated potatoes, stir.
- Important step.. garlic. It has to be fresh, no tube, no jar, no powder.. fresh garlic makes this dish amazing. Peel and press garlic.
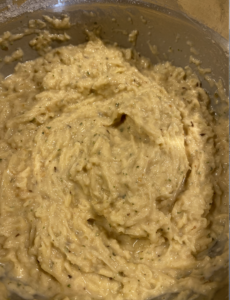
- Add garlic, flour, eggs, marjoram, caraway seeds and salt. Stir to combine.
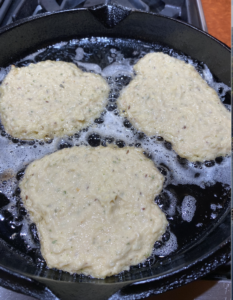
- Heat up cast iron pan, let it warm up and drizzle little bit of avocado oil and little bit of butter.
- Scoop 1/4 cup of batter and pour into the pan. Use a spatula to flatten the pancake.
- Fry for about 2-3 minutes on each side on medium/low heat.
- Serve quickly while still crispy and warm.
Notes:
- Caraway seeds should be in your pantry. Next time you are making mashed potatoes, put a little bit of caraway seeds into the pot while boiling the potatoes. You would be surprised how much flavor that will add to your mashed potatoes.
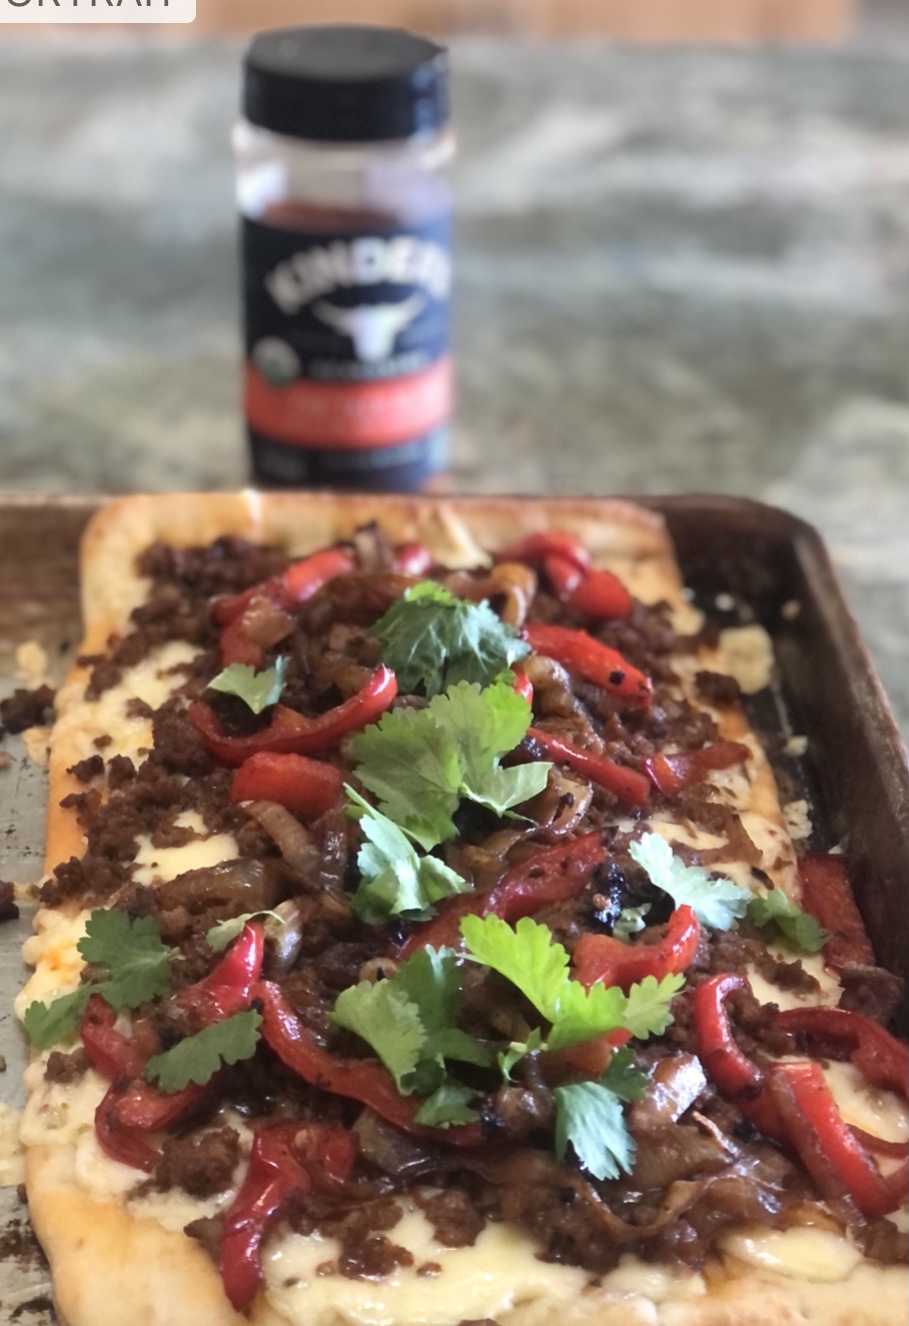
Grassfed Beef Taco Flatbread


We typically don't eat out for lunch very often and eating sandwiches every day can get old, so I was on a mission to find an easy and quick lunch for the ranch crew. Flatbreads are the way to go. Stonefire ready to go artisan flatbreads are sure tasty and great option for lunch. This dish is also good for using leftovers. You can make an extra helping of taco beef mixture the night before and have it ready to go for lunch. It looks fancy, yet easy to assemble!
Ingredients:
- Stonefire Artisan Flatbread (2 in one package)
- 1 lb 3T Ranch grassfed/grass finished ground beef
- 1 red pepper - thinly sliced
- 1 medium onion - thinly sliced
- 1 tablespoon - Kinder's Taco Seasoning with Lime and Ancho Chili (Costco purchase, no sugar and the ancho chili adds great flavors)
- 3 cups PepperJack Cheese - shredded
- 1 tablespoon cilantro
Directions:
- Preheat oven to 425 degrees - convection mode
- Sauté ground beef with 1 tablespoon of taco seasoning. Move to a bowl.
- Sauté onion and peppers for about 15 minutes. If your onions are getting too brown, pour in 2 tablespoons of water. Great trick to have nicely sautéed veggies.
- Shred the cheese
- Place flatbreads onto a large cookie sheet
- I wanted the flatbreads to look pretty, so I have layered the cheese first onto the flatbreads, then taco mixture and then peppers and onions.
- Bake for 15 minutes.
- Sprinkle with cilantro for color.
Now, that is a wow lunch in just few minutes!
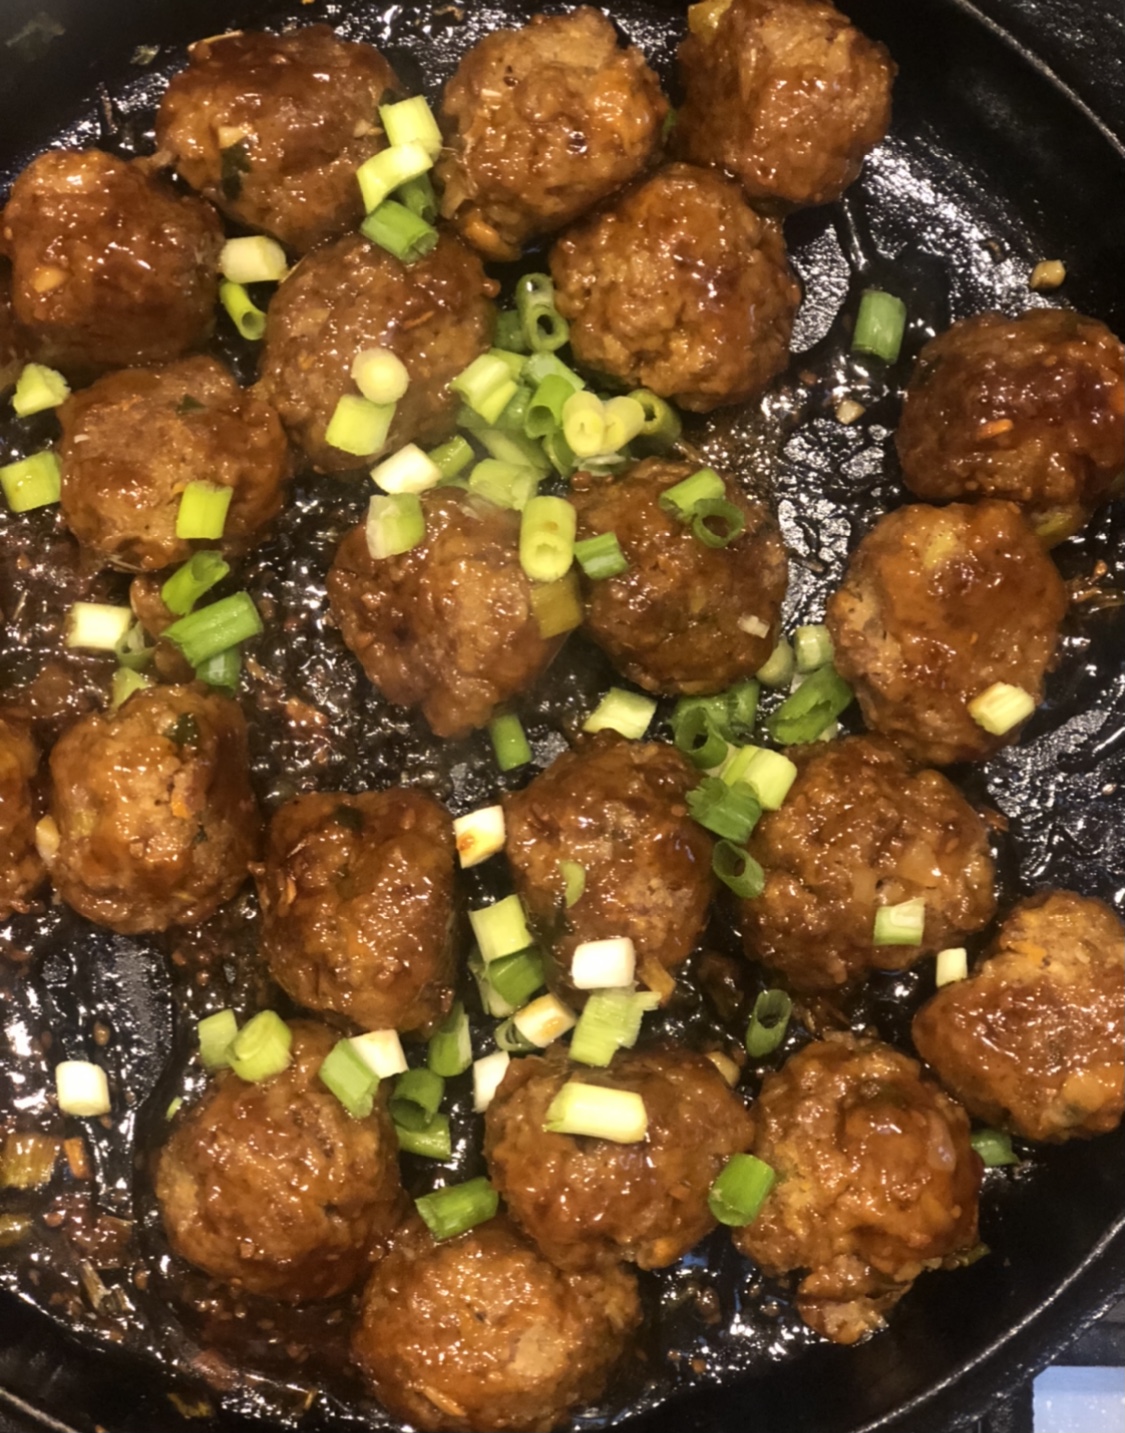
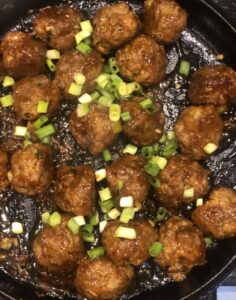
Grassfed Teriyaki Meatballs

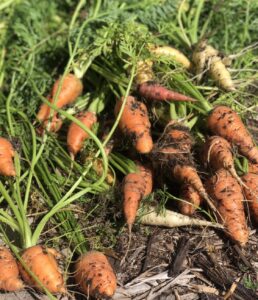
Who doesn't like meatballs, right? Another great recipe for picky eaters, where you can sneak in veggies without them ever knowing! Carrots are in season and we have planted a lot of them! The purple carrots are sure fun to eat!
Ingredients:
- 1 lb 3T Ranch grassfed/grass finished ground beef
- 1 cup Teriyaki sauce - divided - Kinder's Marinade & Sauce
- 1/2 cup of shredded carrots
- 4 garlic cloves chopped
- 3 green onions chopped
- 1 tablespoon grated ginger
- 1/2 small onion chopped
- 1 & 1/2 cup of Panko breadcrumbs
- 1 egg
- 1 teaspoon salt & 1/2 teaspoon pepper
Directions:
- Preheat the oven to 325 degrees.
- Sauté shredded carrots, garlic, green onions, ginger and onion until translucent. TIP: if your veggies are browning too quickly, you can pour in 1/4 cup of water to continue sautéing the veggies. I use this trick all the time.
- Let the vegetables cool down.
- In a mixing bowl combine your sautéed vegetables, egg, ground beef, 1/2 cup of teriyaki sauce and breadcrumbs. Don't forget salt and pepper. Gently mix it all to combine, you don't want it to over mix it.
- Use small ice cream scoop to measure out your meatballs, so they bake evenly.
- Spray baking sheet with cooking spray and load up with meatballs.
- Bake in the oven 20-25 minutes.
- Once your meatballs are out of the oven, put them in pan and pour over the remaining 1/2 to 1 cup of teriyaki sauce. Just depends on how much sauce you would like.
- Serve with fried rice and sprinkle with some extra green onions for color.
We hope you will try our recipe!
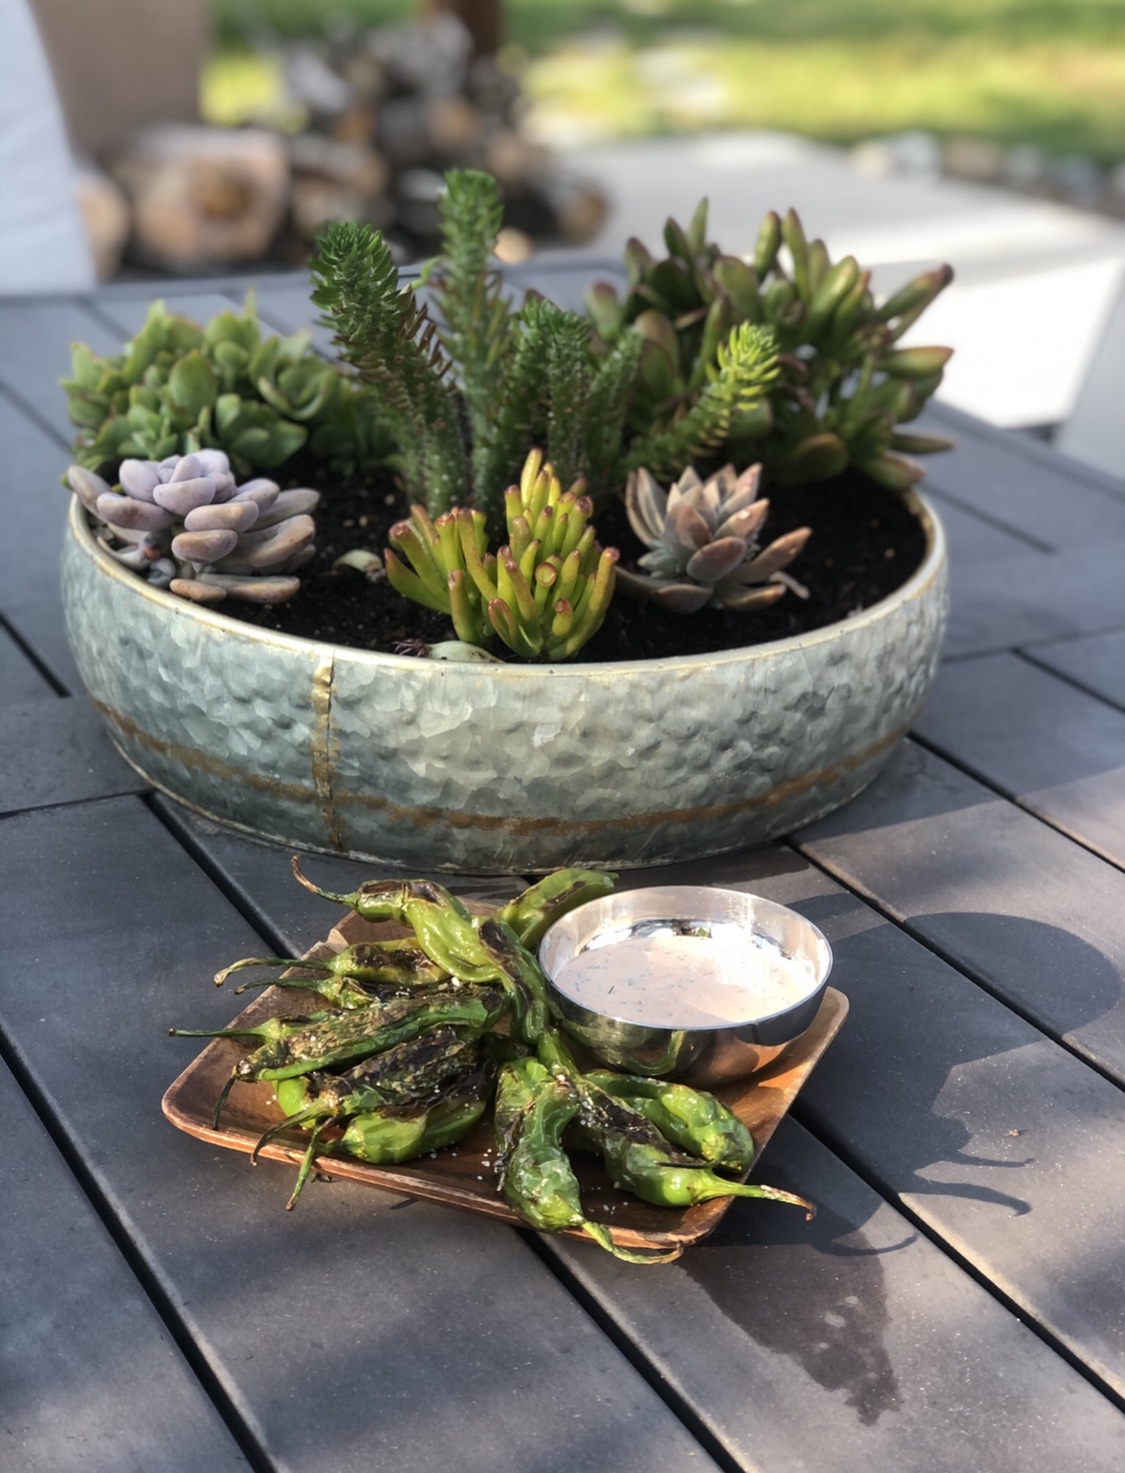
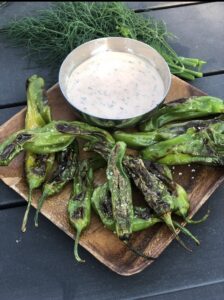
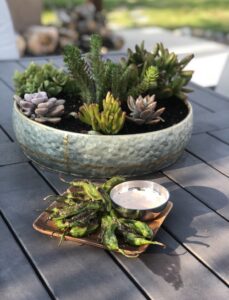
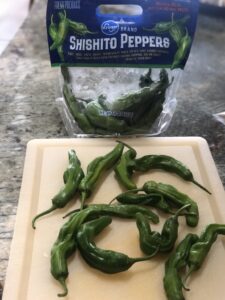
Blistered Shishito Peppers
Have your tried Shishito Peppers yet? All of the Food Network Stars were cooking with this little pepper all last year, yet I couldn't find them in the grocery store. I was excited when this spring, I have found Shishito Peppers seeds at Home Depot. Fingers crossed, later this summer we will have homegrown Shishito Peppers from our garden. To my surprise yesterday, the grocery store had these little peppers available for the first time! I even texted the Cowboss the photo of them from the grocery store. Hey, when you love cooking and your long awaited item is in stock, you get excited. ;)
I had already planned to have burgers for dinner, so I thought, this would be the perfect side to go with it. The key to tasty Shishito Peppers is to blister them and serve them with an amazing dip.
Even though, the cowboys worked outside all day, they have agreed to grill the burgers for me and eat outside. When you are a cowboy and you work all day outside, you are really looking forward to having dinner inside, where the cool breeze comes from the air-conditioning. But, I was able to talk them into eating on the patio as it was a cool evening with no wind.
The Cowboss grilled the burgers to perfection. You ask what is the secret to our amazing burgers? Well, I will share it with you!

3T Ranch Burger Tips: mix 1 teaspoon of salt and 1/2 teaspoon of pepper and 1 tablespoon of dijon mustard with our ground beef and then make patties. (We also like the Weber Chicago Steak Seasoning for our burgers). Now, heat up your grill and once the burgers hit the grill turn it to low heat and cook for about 5 minutes per side.
In the meantime, while the Cowboss was tending to his grill, I made my Blistered Shishito Peppers.
Let me tell you, it was a hit! Even with the little guys. The Shishito Peppers are mild in spice, but watch out 1 in 10 can be spicy! Good thing we like spicy!
The kids and I loved the peppers and dipping them into the tasty sauce. The cowboys put the Shishito Peppers on their burgers along with onion rings. Clearly, it was delicious as I didn't even had a chance to take pictures. Eaten in no time!
Ingredients:
- 1/2 bag of Shishito Peppers (about 13)
- 1 tablespoon avocado oil
- Salt and pepper to taste
Dip:
- 1/4 cup of mayo
- 2 teaspoons of lemon juice
- 1 tablespoon of no sugar ketchup
- 4-5 minced garlic cloves (Use garlic press, if you have it. You really want it minced).
- 1 tablespoon of fresh dill - finely chopped
- Salt and pepper to taste
Directions:
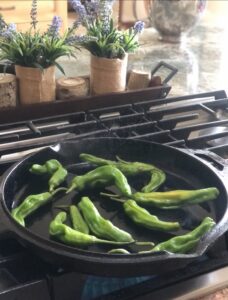
- Heat up a large cast iron pan.
- Pour in one tablespoon of avocado oil.
- Cook peppers, turning occasionally, until they begin to blister on all sides. (about 5 -7 minutes)
- Sprinkle with salt and pepper right away.
Dip:
- Mix all of the dip ingredients and put in the fridge for at least 10 minutes to intensify the flavor. Fresh dill really makes this dip.
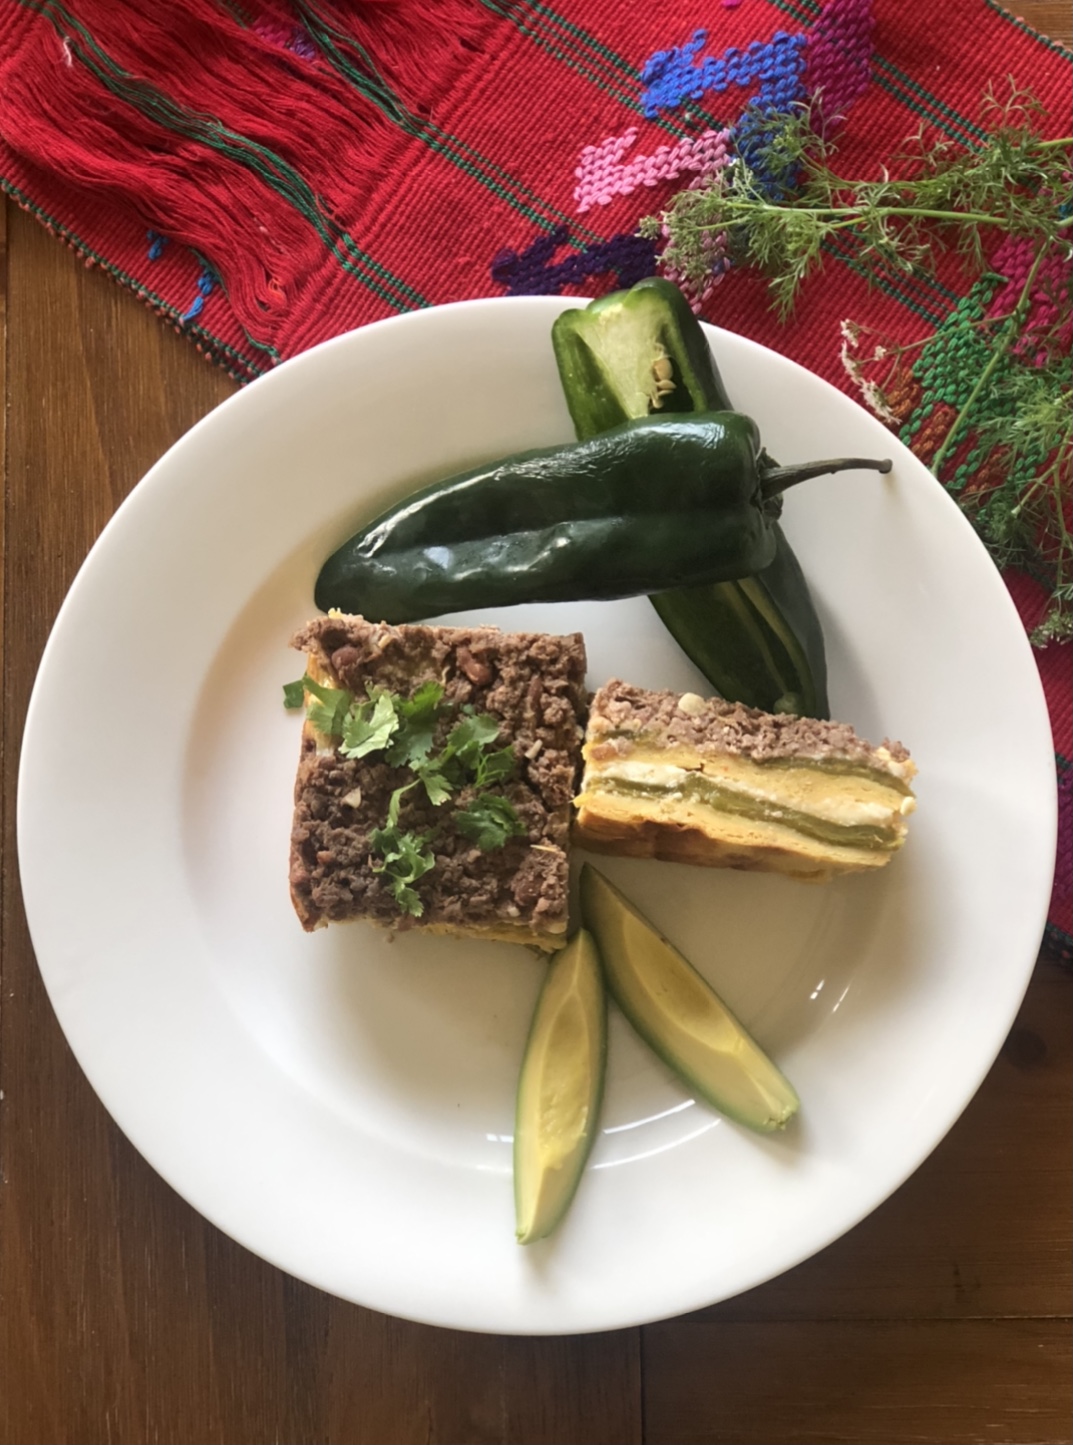
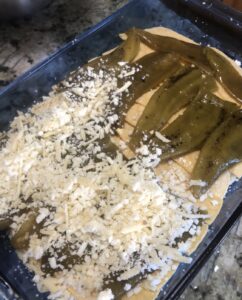
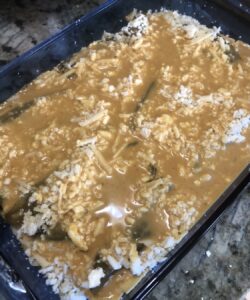
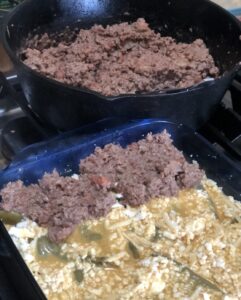
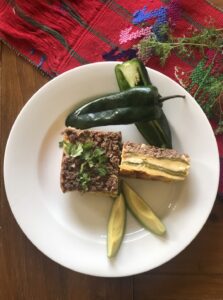
Baked Chile Relleno with Grassfed Ground Beef
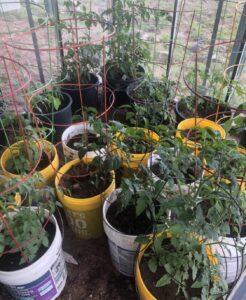
My garden is in full swing and I can't wait to have my own garden peppers later this summer. In the meantime, canned green chilies will have to do for this dish. My green house got destroyed by the wind earlier this spring. It was so sad to see as there was no way we could repair it. New green house would take several weeks to arrive and get assembled and my little pepper and tomato plants needed to be transplanted into bigger pots, so they would have enough time to grow and mature to produce amazing vegetables. Technically, tomatoes are fruits, but by culinary classification tomatoes are vegetables.
The Cowboss made me a temporary shelter for my plants, so they wouldn't get destroyed by the harsh sun and wind. He used plexiglass and fence posts to create a little temporary green house and moved all of the plants under the awning of our barn. Sure miss my green house, but the plants are happy and growing. And as I found out, my shelter is also safe from nosy critters like our horses, who are grazing the pasture by the barn and were intrigued by the new structure. Nope, these plants are not for you four-legged friends.

Now, let me get to this recipe. We love love chile relleno, but it is hard to make and the deep fryer always makes a mess. This version is much easier and faster to make! This dish is also great for potluck as it makes a lot! You can feed a crowd for sure.
Ingredients:
- 27 ounces green chillies - whole
- 16 ounces refried beans
- 1 1/2 pounds 3T ground beef
- 1/2 onion chopped
- 3 garlic cloves chopped
- 1 teaspoon salt
- 1/2 teaspoon pepper
- 10 oz Queso Fresco cheese shredded
- 1 1/2 cups Pepperjack cheese
- 15 corn tortillas cut into 1 inch wide strips
Topping:
- 4 ranch fresh eggs
- 1/4 cup flour
- 1/2 cup evaporated milk
- 1/2 teaspoon cumin
- 1/2 teaspoon chili powder
- 1/2 teaspoon garlic powder
- 1/2 teaspoon onion powder
Directions:
- Heat oven to 375 degrees and grease 9x13 baking pan.
- Mix eggs, flour, evaporated milk and all seasonings.
- Mix Queso Fresco and Pepperjack cheeses together.
- Brown ground beef with onion and garlic. Remember to add the garlic just before the meat is cooked, so you wouldn't burn the small garlic pieces. Season with salt and pepper.
- Add refried beans to the pan and cook until all mixed together.
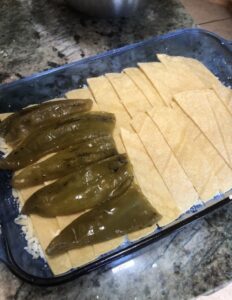
- Cut tortillas into 1 inch wide strips.
- Place 1/2 of the strips on the bottom of the baking pan.
- Layer 1/2 of the can of green chilies (whole) over the strips.
- Layer 1/2 of the cheese and then another layer of tortillas, then layer of green chillies and the remaining 1/2 of the cheese.
- Pour egg mixture topping over the top.
- Spread ground beef and beans over the egg mixture.
- Cover with aluminum foil.
- Bake for 30 minutes and then remove the foil and bake for another 15 minutes.
- Serve with guacamole and Mexican crema.

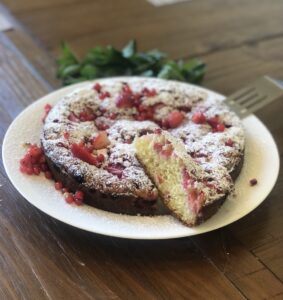
3T Ranch Summer Berry Cake
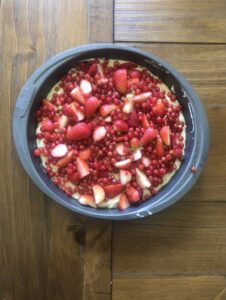

Have you tried red currant berries before? It is native across Europe and great for jams and light summer cakes. My grandparents had many red currant bushes in their garden and I remember picking them as a little child. My grandma or as we called her "babi" baked many of these wonderful light cakes - "bublanina". You can use any fresh fruit you have, it always turns out airy and tasty.
Saturday afternoons at my grandparents' house were always reserved for visits from the neighbors and you could count on that this cake would be served along with hot coffee, yes.. even in the summer time. So, as I'm sitting here on Saturday afternoon, typing up this recipe and enjoying my own version of her cake, it sure brings many wonderful memories of my grandparents.
I have ordered the red currant shrub for my garden a few years ago and the very next year it was producing fruit. The berries are known as super fruits as they have naturally high antioxidant capacity and they also have a good supply of vitamin C and K, manganese and potassium.

Ingredients:
- 1/4 grassfed unsalted butter
- 1/2 cup plus 1 tbl granulated sugar
- 1 farm fresh egg
- 1 teaspoon vanilla extract
- 1 cup flour
- 1/2 teaspoon baking soda
- 1/2 teaspoon baking powder
- 1/4 teaspoon salt
- 1/2 cup milk
- 1/2 tablespoon apple cider vinegar
- 2 cups of fresh or frozen berries of your choice (I have used strawberries and red currants from my garden)
Instructions:
- Preheat oven to 400 degrees.
- Grease and line with parchment paper 9-inch round cake pan.
- Mix milk and apple cider vinegar and let it sit.
- Beat together butter and 1/2 cup of sugar for 2 minutes.
- Beat in egg and vanilla.
- In a separate bowl, sift together flour, baking powder, baking soda and sat and add to the bowl with butter and sugar. Gently stir a couple of times.
- Gradually pour in the milk and vinegar mixture that just turned into buttermilk, stir until incorporated, don't over mix.
- Spread batter evenly into the pan.
- Evenly arrange fruit over the top of the batter.
- Sprinkle 1 tablespoon of sugar.
- Bake 25 minutes. Remove from oven and let it stand 10 minutes before serving.
- Sprinkle with powdered sugar and some leftover fresh fruit.